
Documentation Index
Fetch the complete documentation index at: https://docs.redbrickai.com/llms.txt
Use this file to discover all available pages before exploring further.
Create a Storage Account
If you already have a storage account, skip this section, and head directly to the next section.
- Sign in to your Azure portal.
- On the left portal menu, select Storage Accounts to list all of your storage accounts.
- On the Storage Accounts page, click create.
Basics Tab
You need to fill out the required fields under the basics tab, please refer to the table below as a quick guide.| Section | Field | Description |
|---|---|---|
| Project details | Subscription | Select the subscription for the new storage account. |
| Project details | Resource group | Create a new resource group for this storage account, or select an existing one. For more information, see Resource groups. |
| Instance details | Storage account name | Choose a unique name for your storage account. |
| Instance details | Region | Select the appropriate region for your storage account. For more information, see Regions and Availability Zones in Azure. |
| Instance details | Performance | Select your desired level of performance, or select the default option. |
| Instance details | Redundancy | Select your desired redundancy configuration. |
Other Settings
To configure other advanced settings on your storage account, head to advanced tabs, otherwise you can continue with default settings.Review + Create
When you navigate to the Review + create tab, Azure runs validation on the storage account settings that you have chosen. If validation passes, you can proceed to create the storage account.Create a Container
If you already have a container, please skip to the next section.
- Head to the Storage Accounts page from the left portal menu, and select the Storage Account you want to create your container in.
- On the left menu of the Storage Account, scroll to the Data Storage section, then select Containers.
- Create a container by clicking on the + Container button.
- Type in a name for the container, and set the level of public access to the container (we recommend Private)
Get Your Connection String
- Navigate to your Storage Account on your Azure portal.
- In the left menu of the Storage Account, scroll to Security + Networking, and select Access Keys.
- On the Access Keys page, click on Show keys at the top, and copy one of the connection strings
Create a RedBrick Storage Method
Head over to your RedBrick AI Account:- Click on the Storage Method tab on the left sidebar, and Create New Storage Method.
- In the creation dialog, select Azure Blob as the storage type and enter your connection string, and storage account name.
Enable CORS on Your Storage Account
To ensure your data is private and secured, RedBrick uses signed URLs to render data in browsers. To allow RedBrick to use signed URLs to serve data, you need to enable CORS on the Storage Account. This can be done from your Storage Account -> Settings -> Resource Sharing (CORS). We recommend the following CORS policy: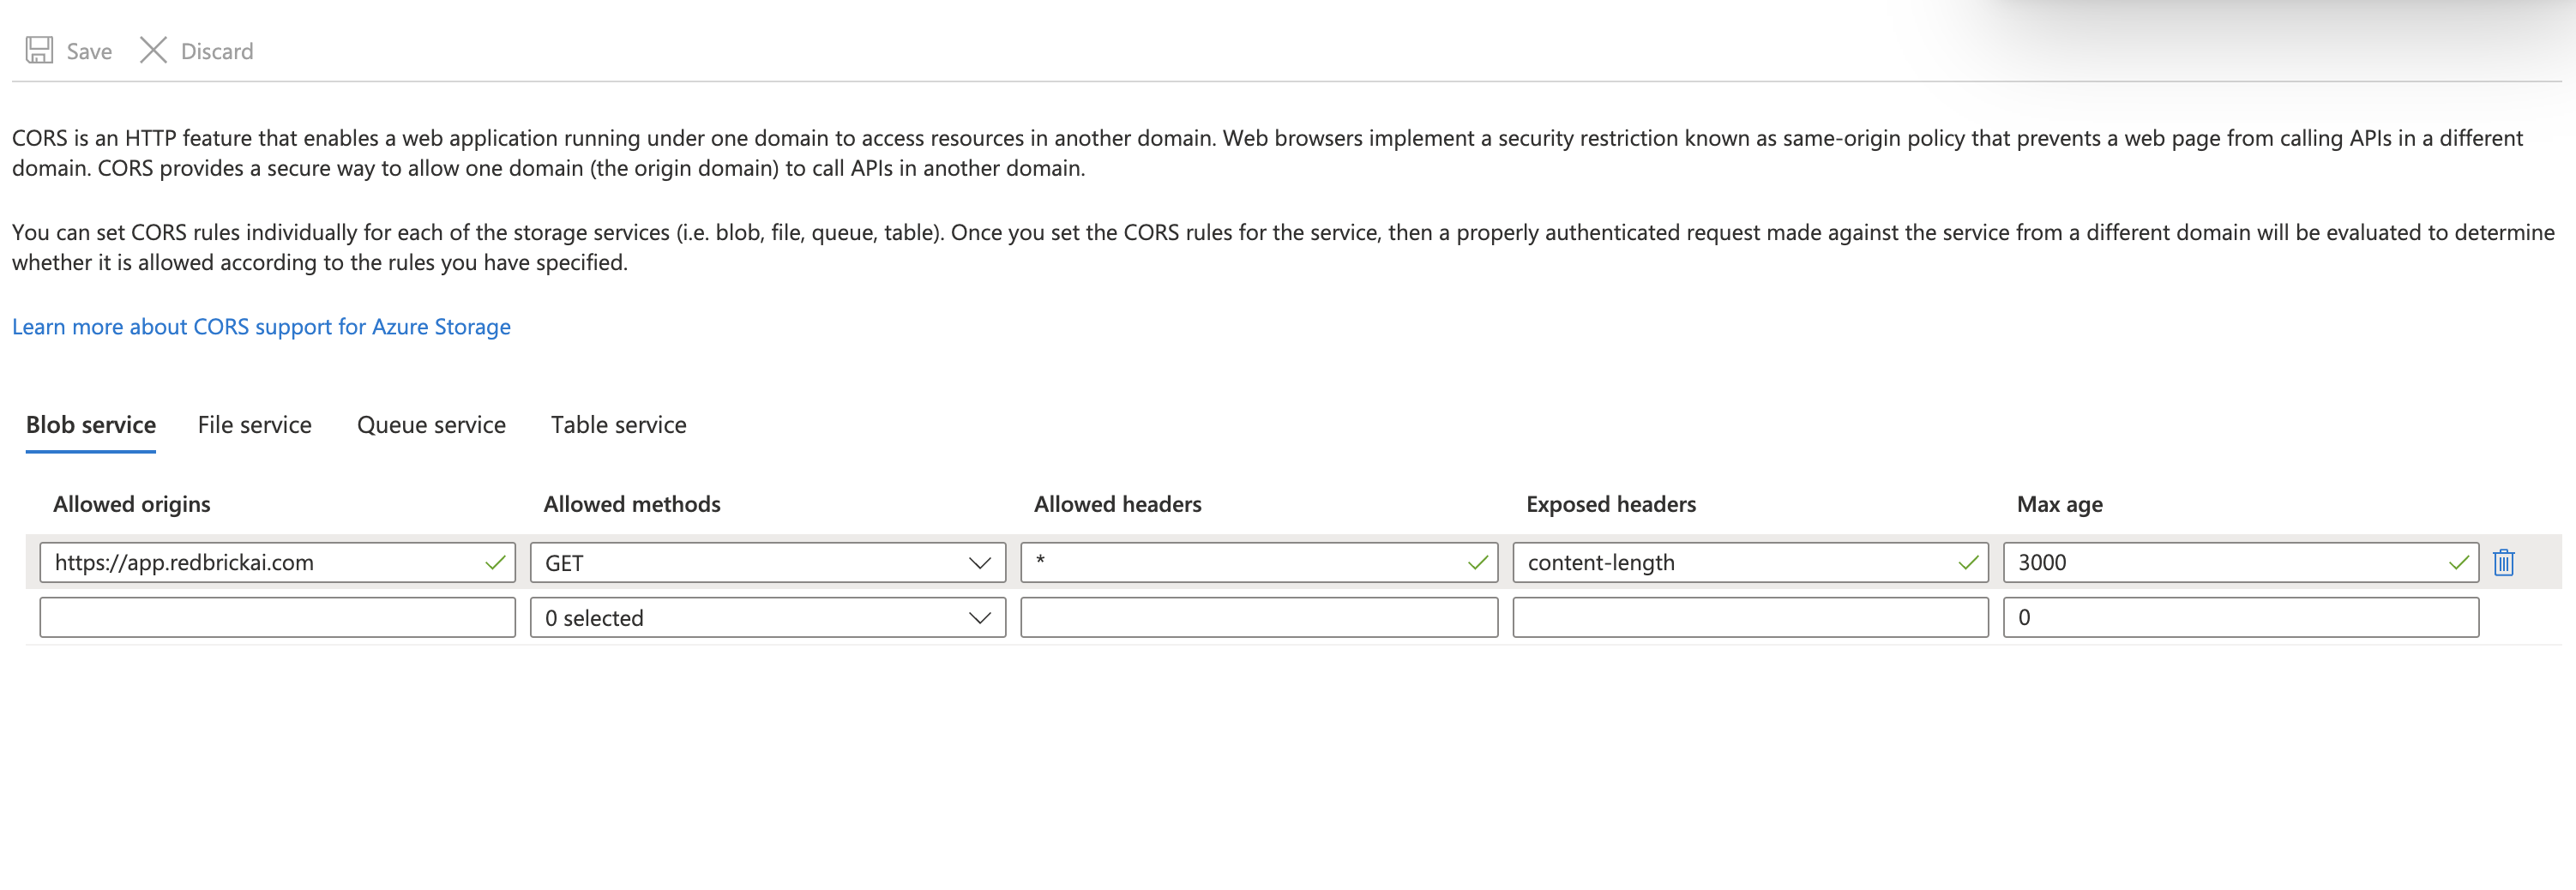
Verify Your Azure Connection
Once you’ve added your Azure storage method on RedBrick AI, you can verify the connection by doing the following:- First upload an image to your container within your azure storage account (e.g.
image.png) - Head to the Storage Method page on RedBrick AI, and click on the verify button of the storage method you just created.
- Paste the unique path of your blob, which will be in the following format:
container_name/blob_path. So if you uploadedimage.pngwithin the sub-folderimagesin your containerimage-container, your path would beimage-container/images/image.png. - If the connection was successful, you should see the image appear once you verify.
Items Path
Once you’ve created your Azure Storage method on RedBrick AI, you have to upload an items list to your projects to import specific datapoints. Please have a look at the items list documentation for an overview of the format for the JSON file. For data stored in an Azure container, theitems path needs to be formatted as follows:
container-name is inside the Storage Account.
Shared Access Signature
You can also use a “Shared Access Signature” URL for enabling access to your bucket through RedBrick AI.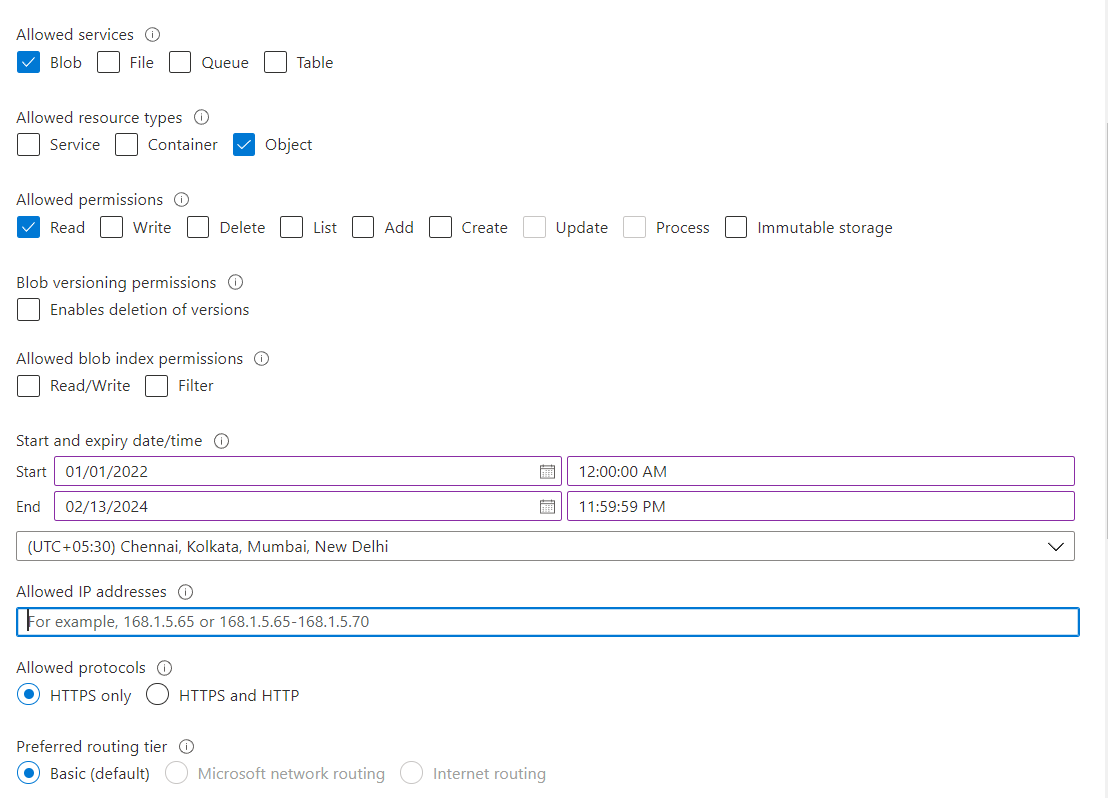
- Expiry should be until the time you want to have access to your data through RedBrick AI, with this time expires you will lose access to your data through RedBrick AI and will have to update the configuration. We recommend giving this at least a few years, you can always cancel the access later.
- IP address (optional) could be your permanent network address range
- Only Read permissions are necessary
Upload Items
When you want to upload data that is in a connected storage method to the RedBrick AI platform you will do this as an Items List. Depending on which level of permissions you want to restrict access to with your SAS URL, you will need to create your “items” differently. These items tell RedBrick AI where to find your data.| Permissions | Sample item |
|---|---|
| Connection string and Service level SAS: | “container/folder/item.jpg” |
| Container level SAS: | “folder/item.jpg” |
| Blob level SAS: (not recommended) | ”.” |