
Signing Up for AWS
The first step to preparing data storage on Amazon S3, is to sign up for an AWS account on https://aws.amazon.com.Create an S3 Bucket
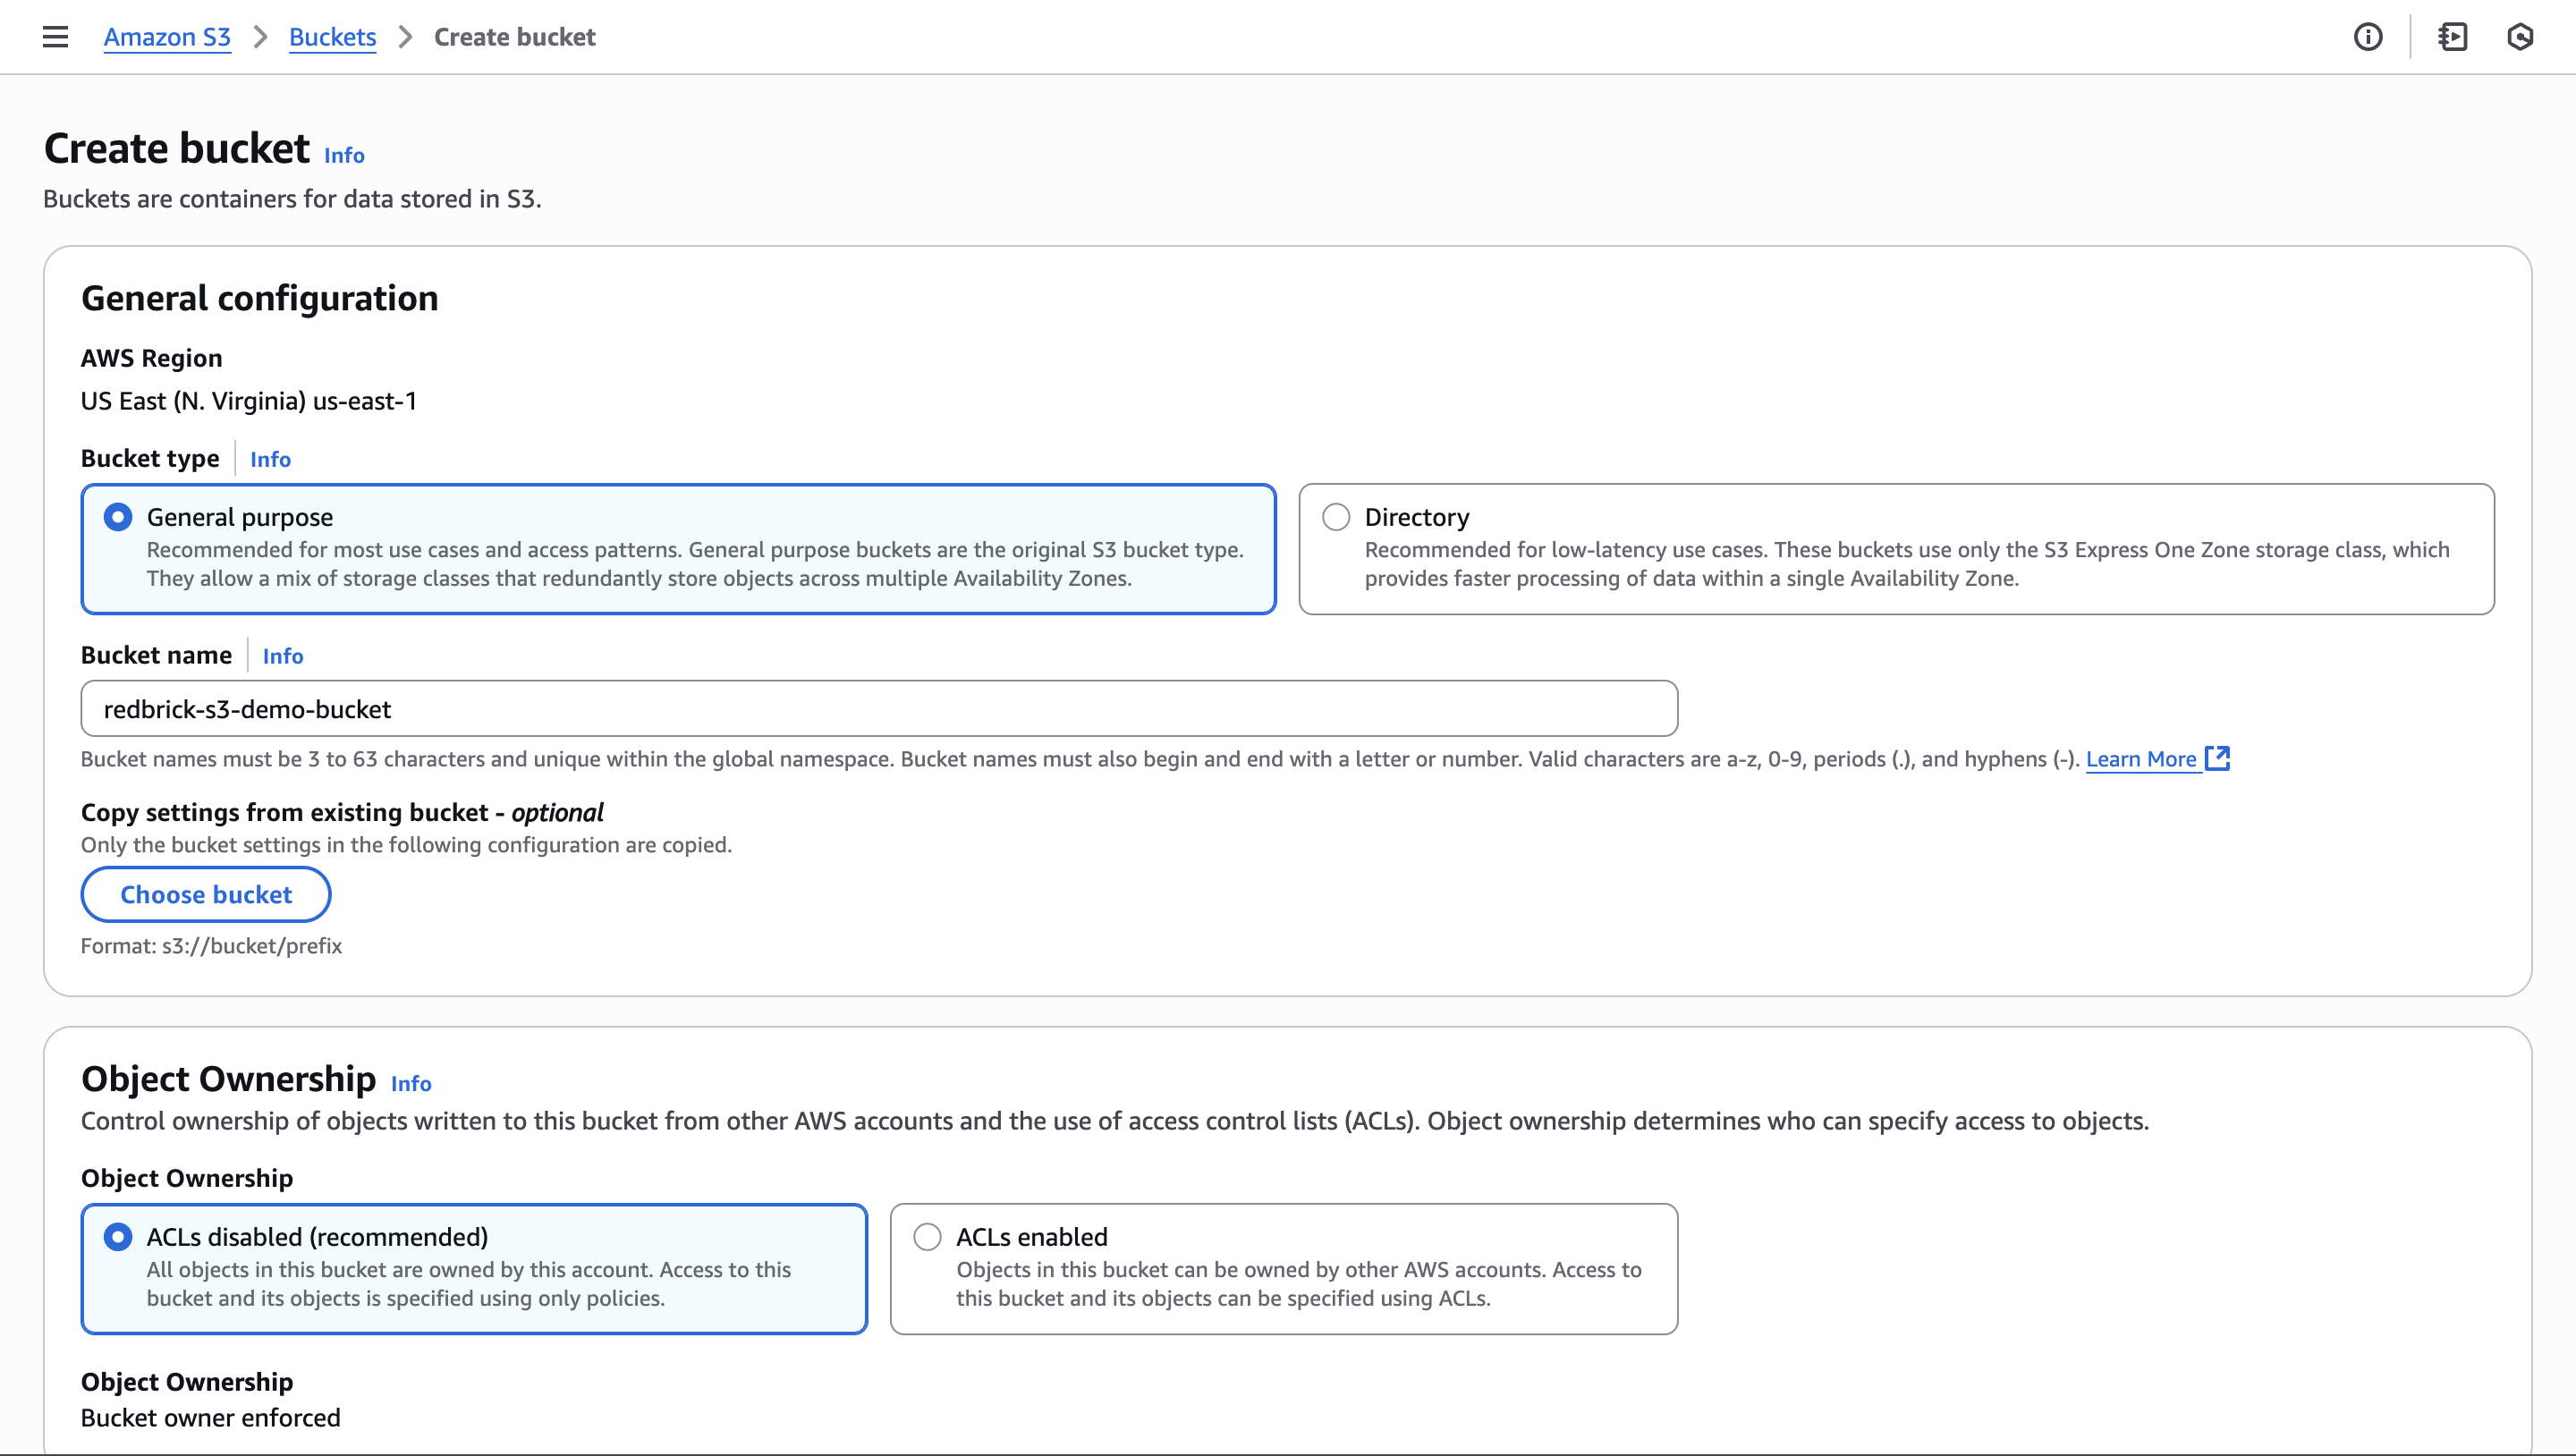
Skip creating a bucket if you want to use an existing bucket
- Create a new bucket, give it a unique name (this will be needed later).
- Select the region of the bucket - we recommend keeping it close to your physical location for the best data transfer experience.
- We recommend blocking all public access to your s3 bucket, and giving the RedBrick AI interface access through IAM credentials.
- You can leave all other settings as default.
S3 Bucket Settings
To ensure your data is private and secured, RedBrick uses pre-signed URLs to render data in browsers. To allow RedBrick to use pre-signed URLs to serve data, you need to define a CORS policy on the S3 bucket. Here is the AWS S3 documentation on CORS. To set the proper CORS policy, go to the Permissions tab in your S3 bucket. Under Permissions select the CORS configuration and copy paste the following block of code.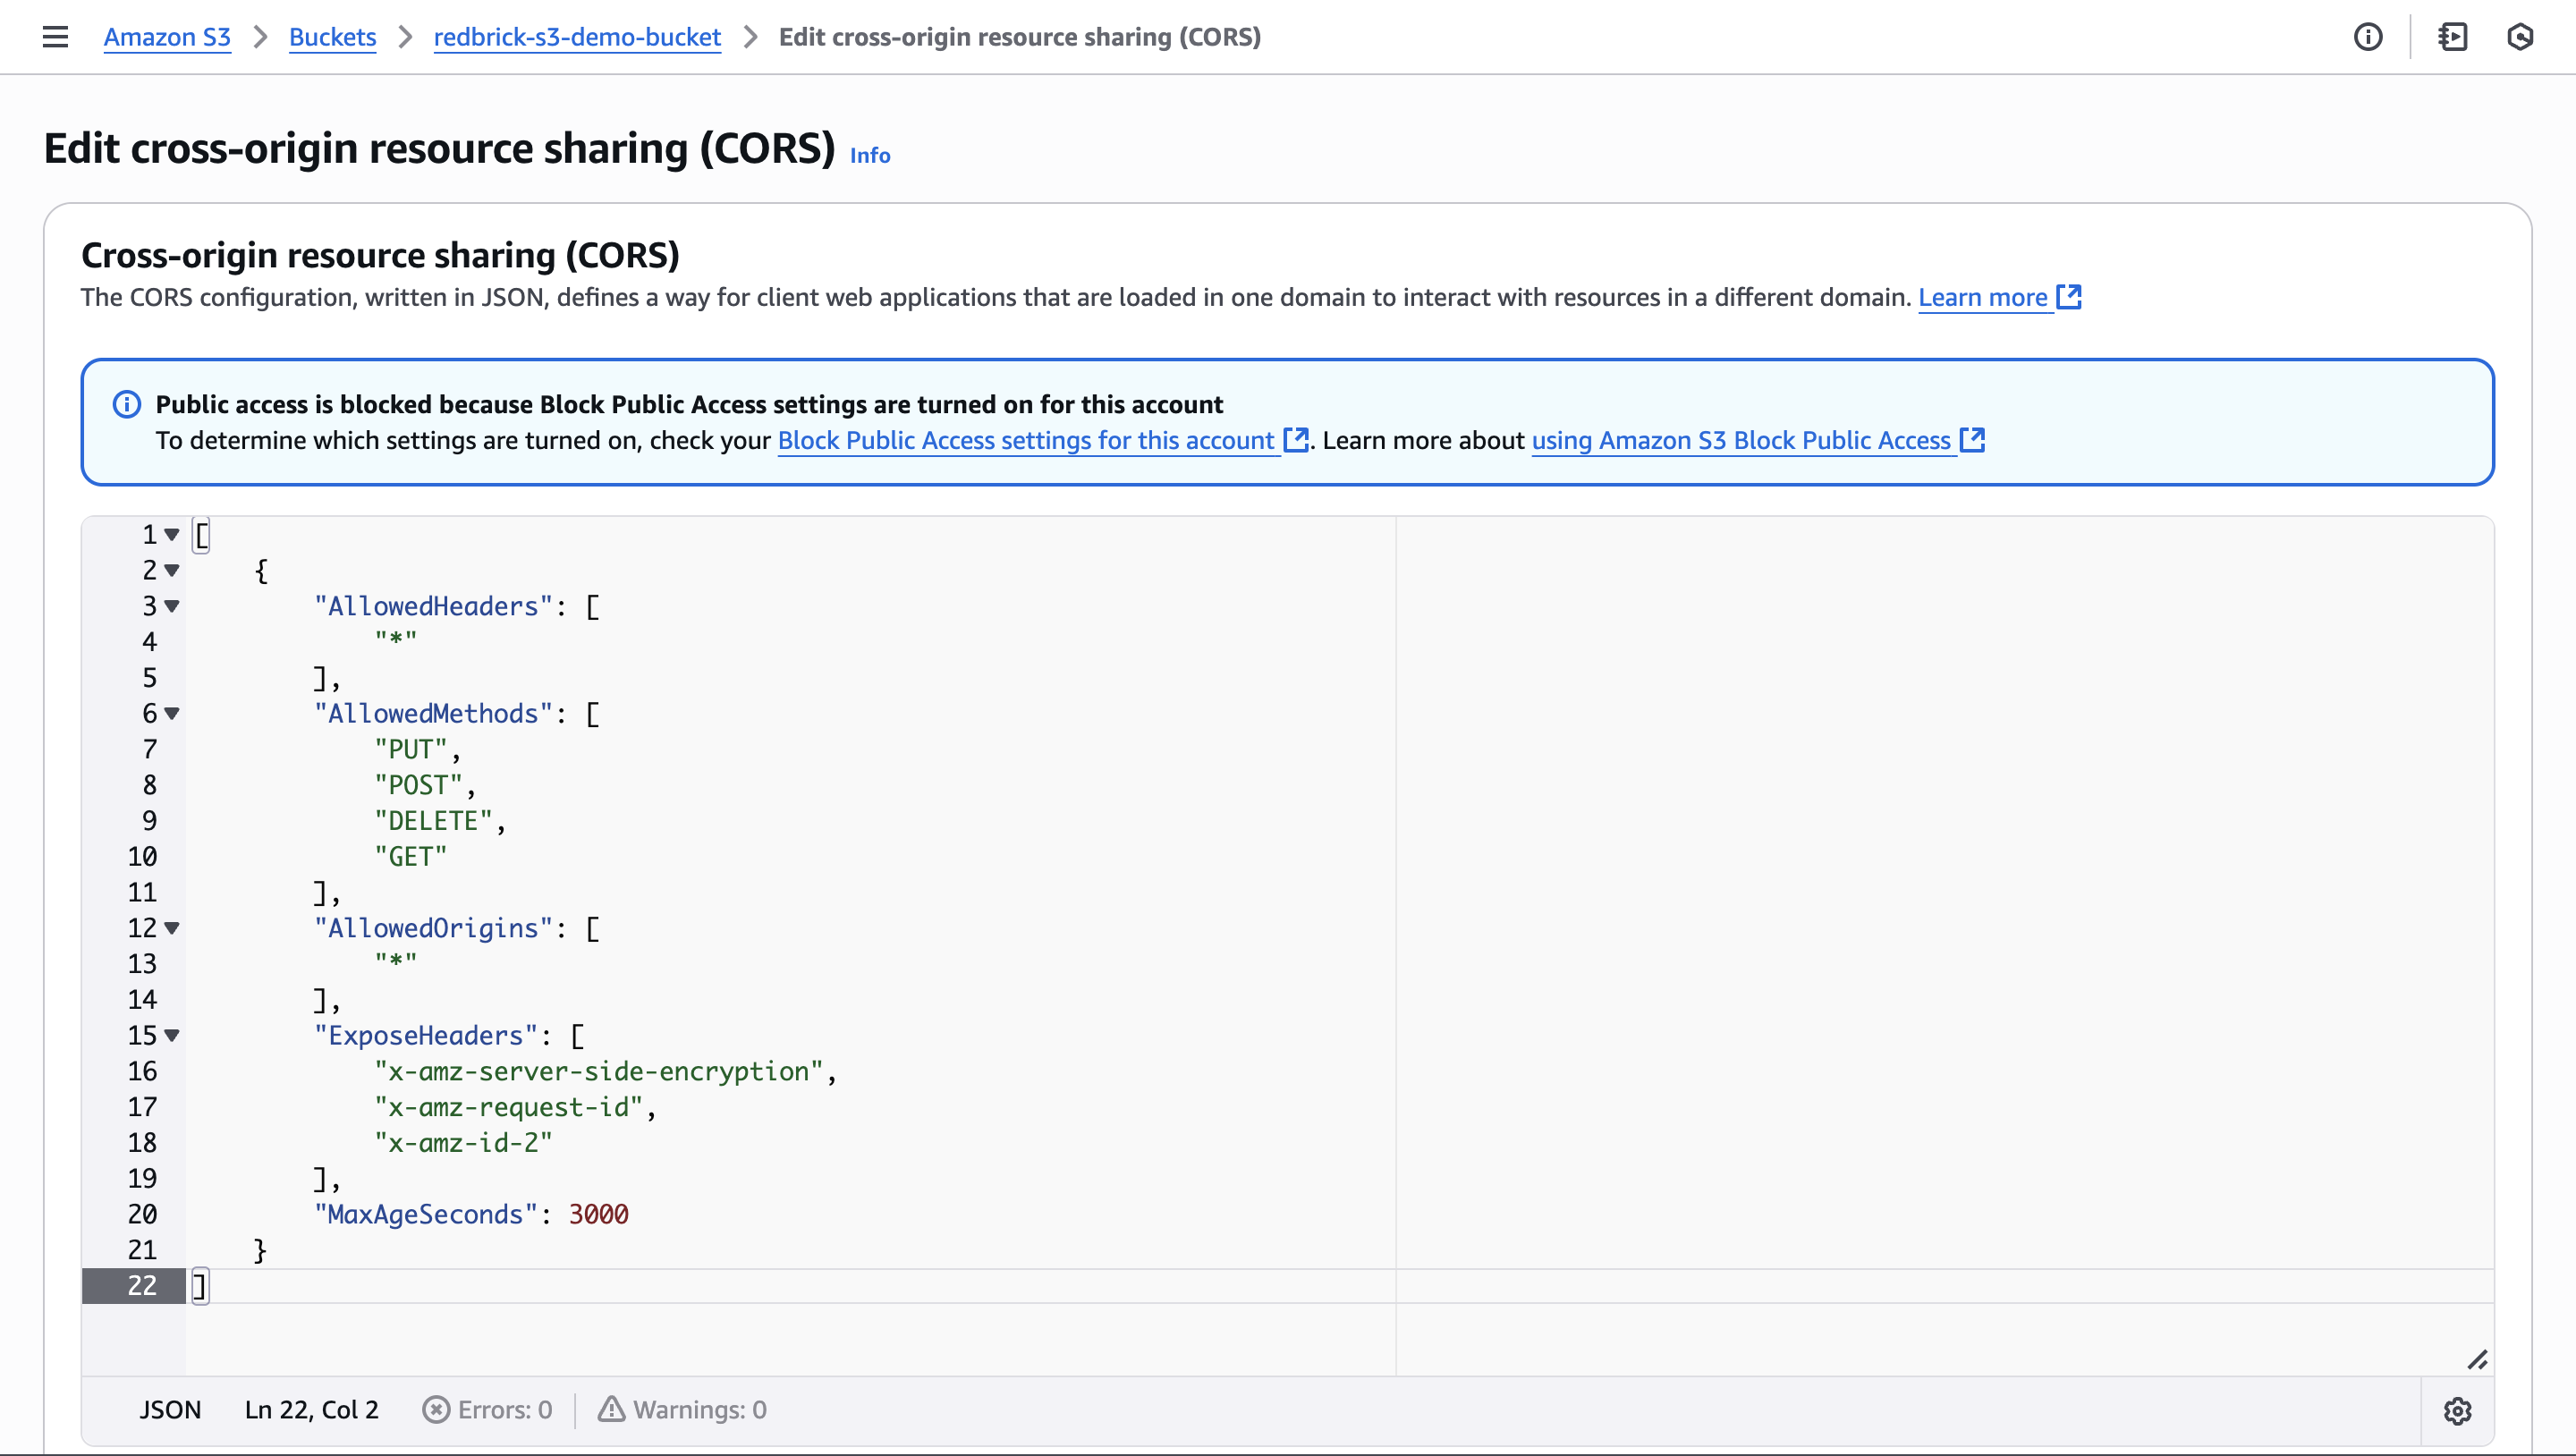
Access and Secret Keys
If your S3 Bucket blocks public access to the data, you will have to create an IAM user to allow RedBrick to securely access the data in your S3 bucket. AWS IAM enables you to manage access to your AWS services. You can read about IAM in the AWS documentation. To create an IAM user from the AWS console, follow these steps:- Sign in to the AWS Management Console and open the IAM console
- In the IAM console navigation pane, select Users and then select Add user.
Add User
- Type the user name for the new user.
- Select Programmatic Access
Permissions
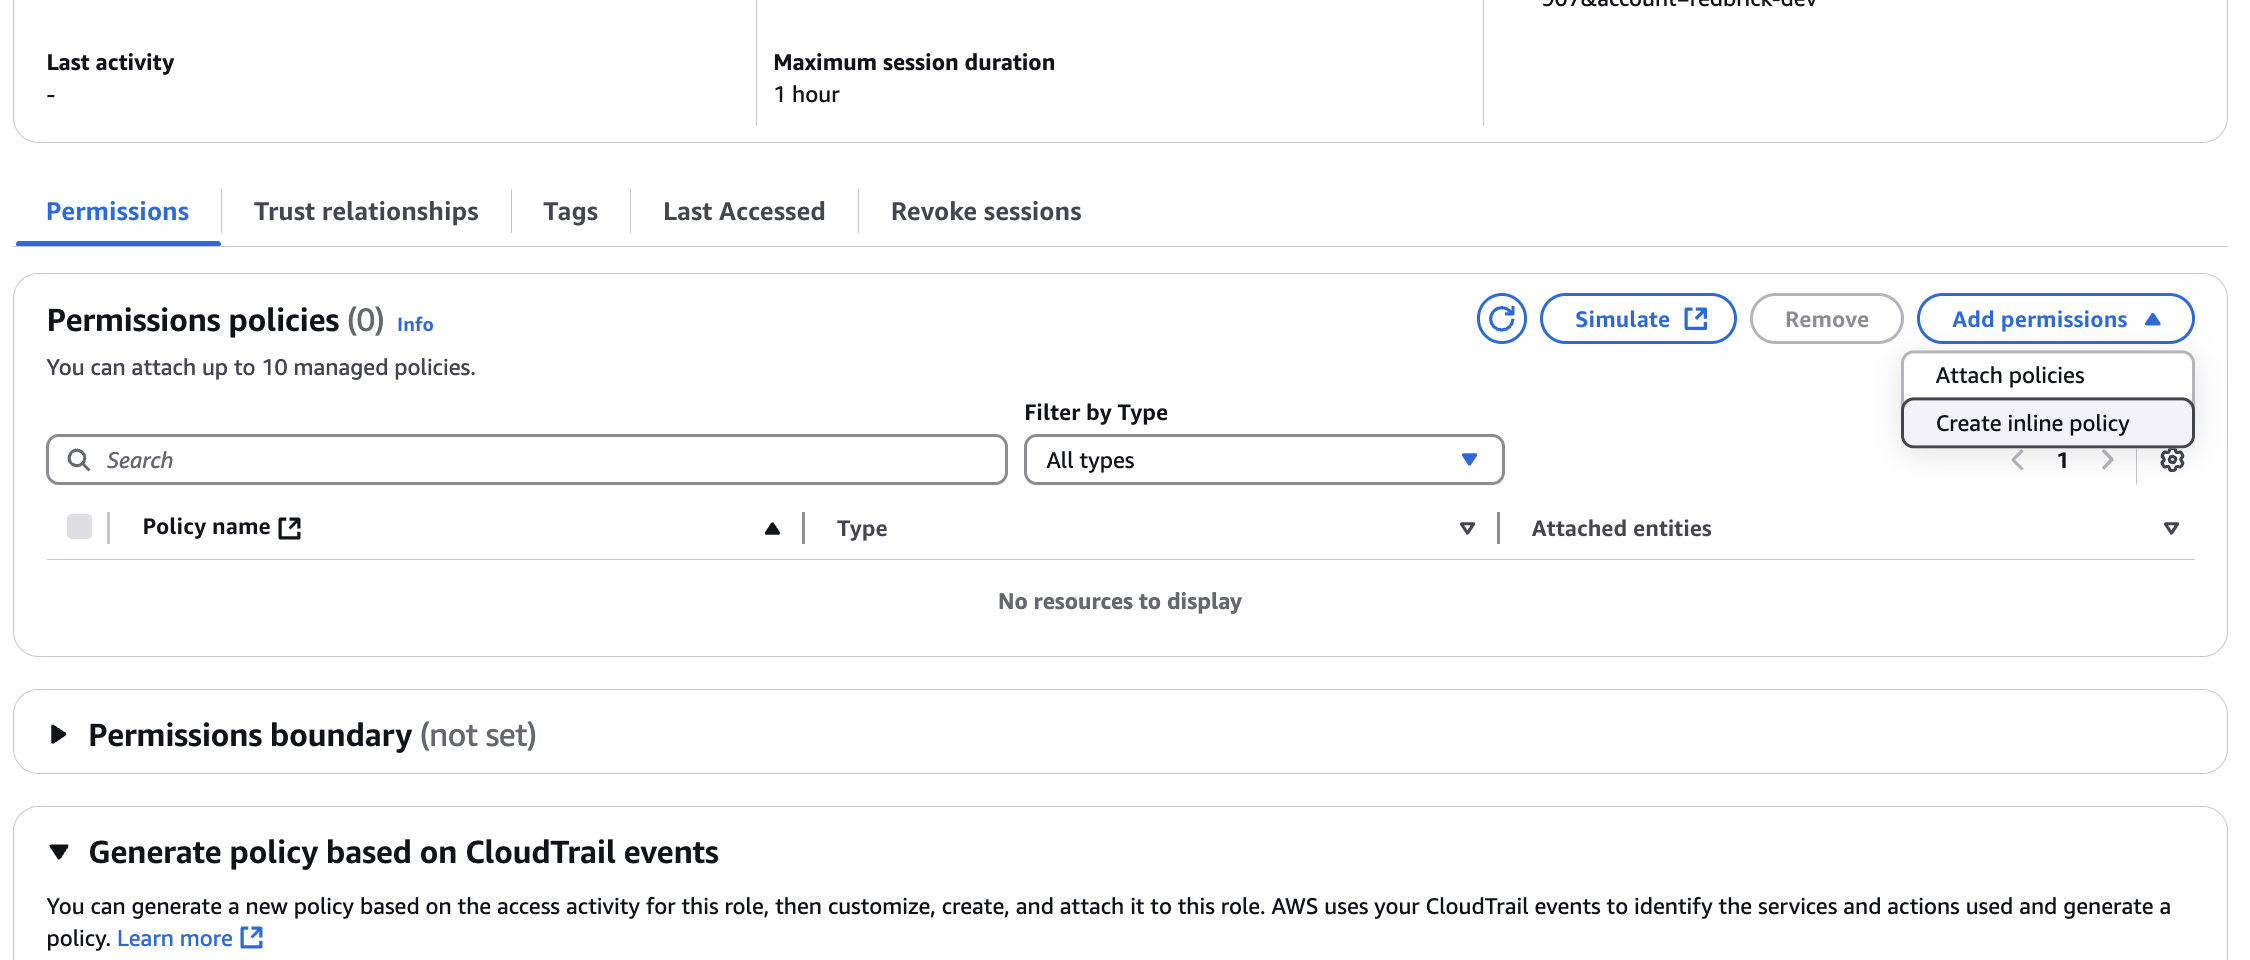
- Click on Attach existing policies directly
- Create a new policy
- Paste the following block of JSON inside the JSON tab. Remember to replace
<your_s3_bucket_name_here>with the name of the S3 bucket that has your data. You can modify the Resource path for added security or specificity.
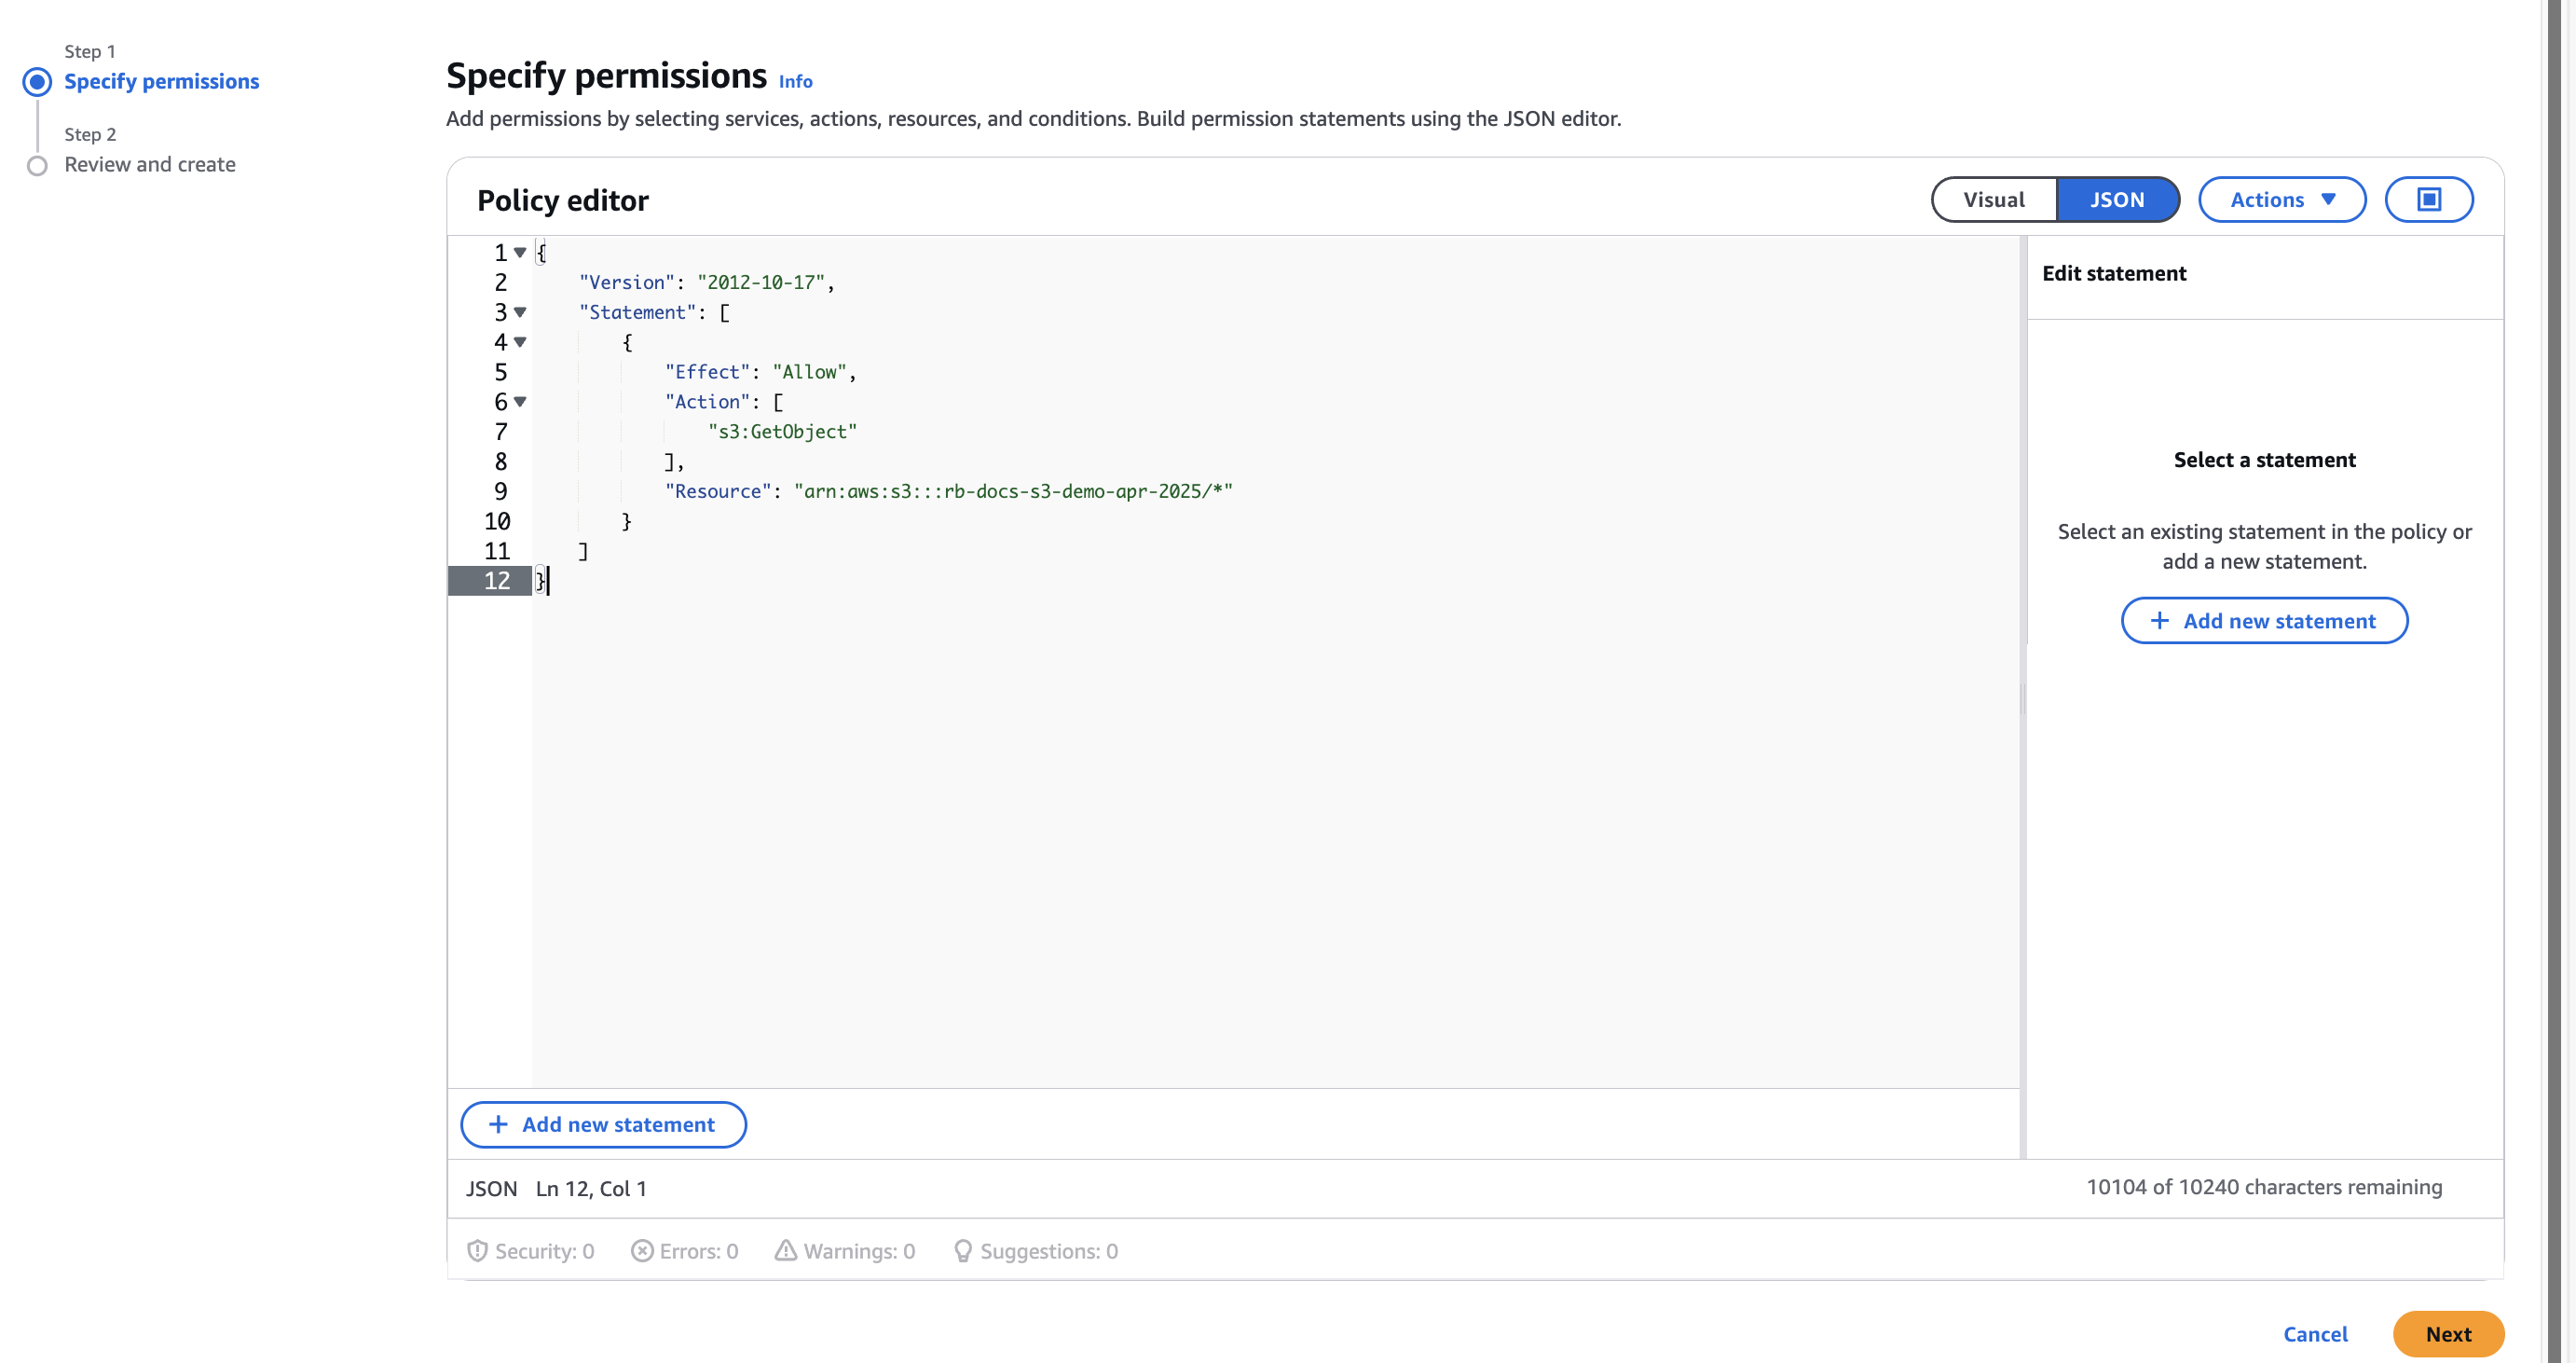
If your bucket will be used as an annotation storage bucket, you need to add PUT object access as well.
- Review your policy and create it.
- Head back to your IAM user creation and attach the policy you just created.
Granular Permissions
You can configure your S3 bucket to give RedBrick AI access to particular data points inside your s3 bucket by modifying the “Resource” section in the file above.
You can configure your S3 bucket to give RedBrick AI access to particular data points inside your s3 bucket by modifying the “Resource” section in the file above.
Create the User
- Create the user and download Access and Secret key .csv
- Store the CSV file with your keys carefully.
Items Path
Once you’ve created your AWS Storage method on RedBrick AI, you have to upload an items list to your projects to import specific datapoints. Please have a look at the items list documentation for an overview of the format for the JSON file. For data stored in an AWS s3 bucket, theitems path needs to be formatted as follows:
root-folder is inside the AWS s3 bucket storage method.
Programmatically Generate Items List For S3
If you don’t have a standard naming convention for your files, or aren’t sure which files are in your s3 bucket, use the AWS CLI to enumerate all objects inside the bucket. Using this list, you can programmatically generate an items list.Installing and Configuring the AWS CLI
Have a look at the AWS documentation for installing the CLI. For mac users, runningbrew install awscli is the easiest way to install the AWS CLI.
Once you have the AWS CLI installed, you need to configure the cli with your AWS root account Access Key and Secret Key to give permissions to AWS CLI. After installing AWS CLI, do the following.
.txt file. Then write a simple script to convert that output into a JSON file in the Items List format covered above.