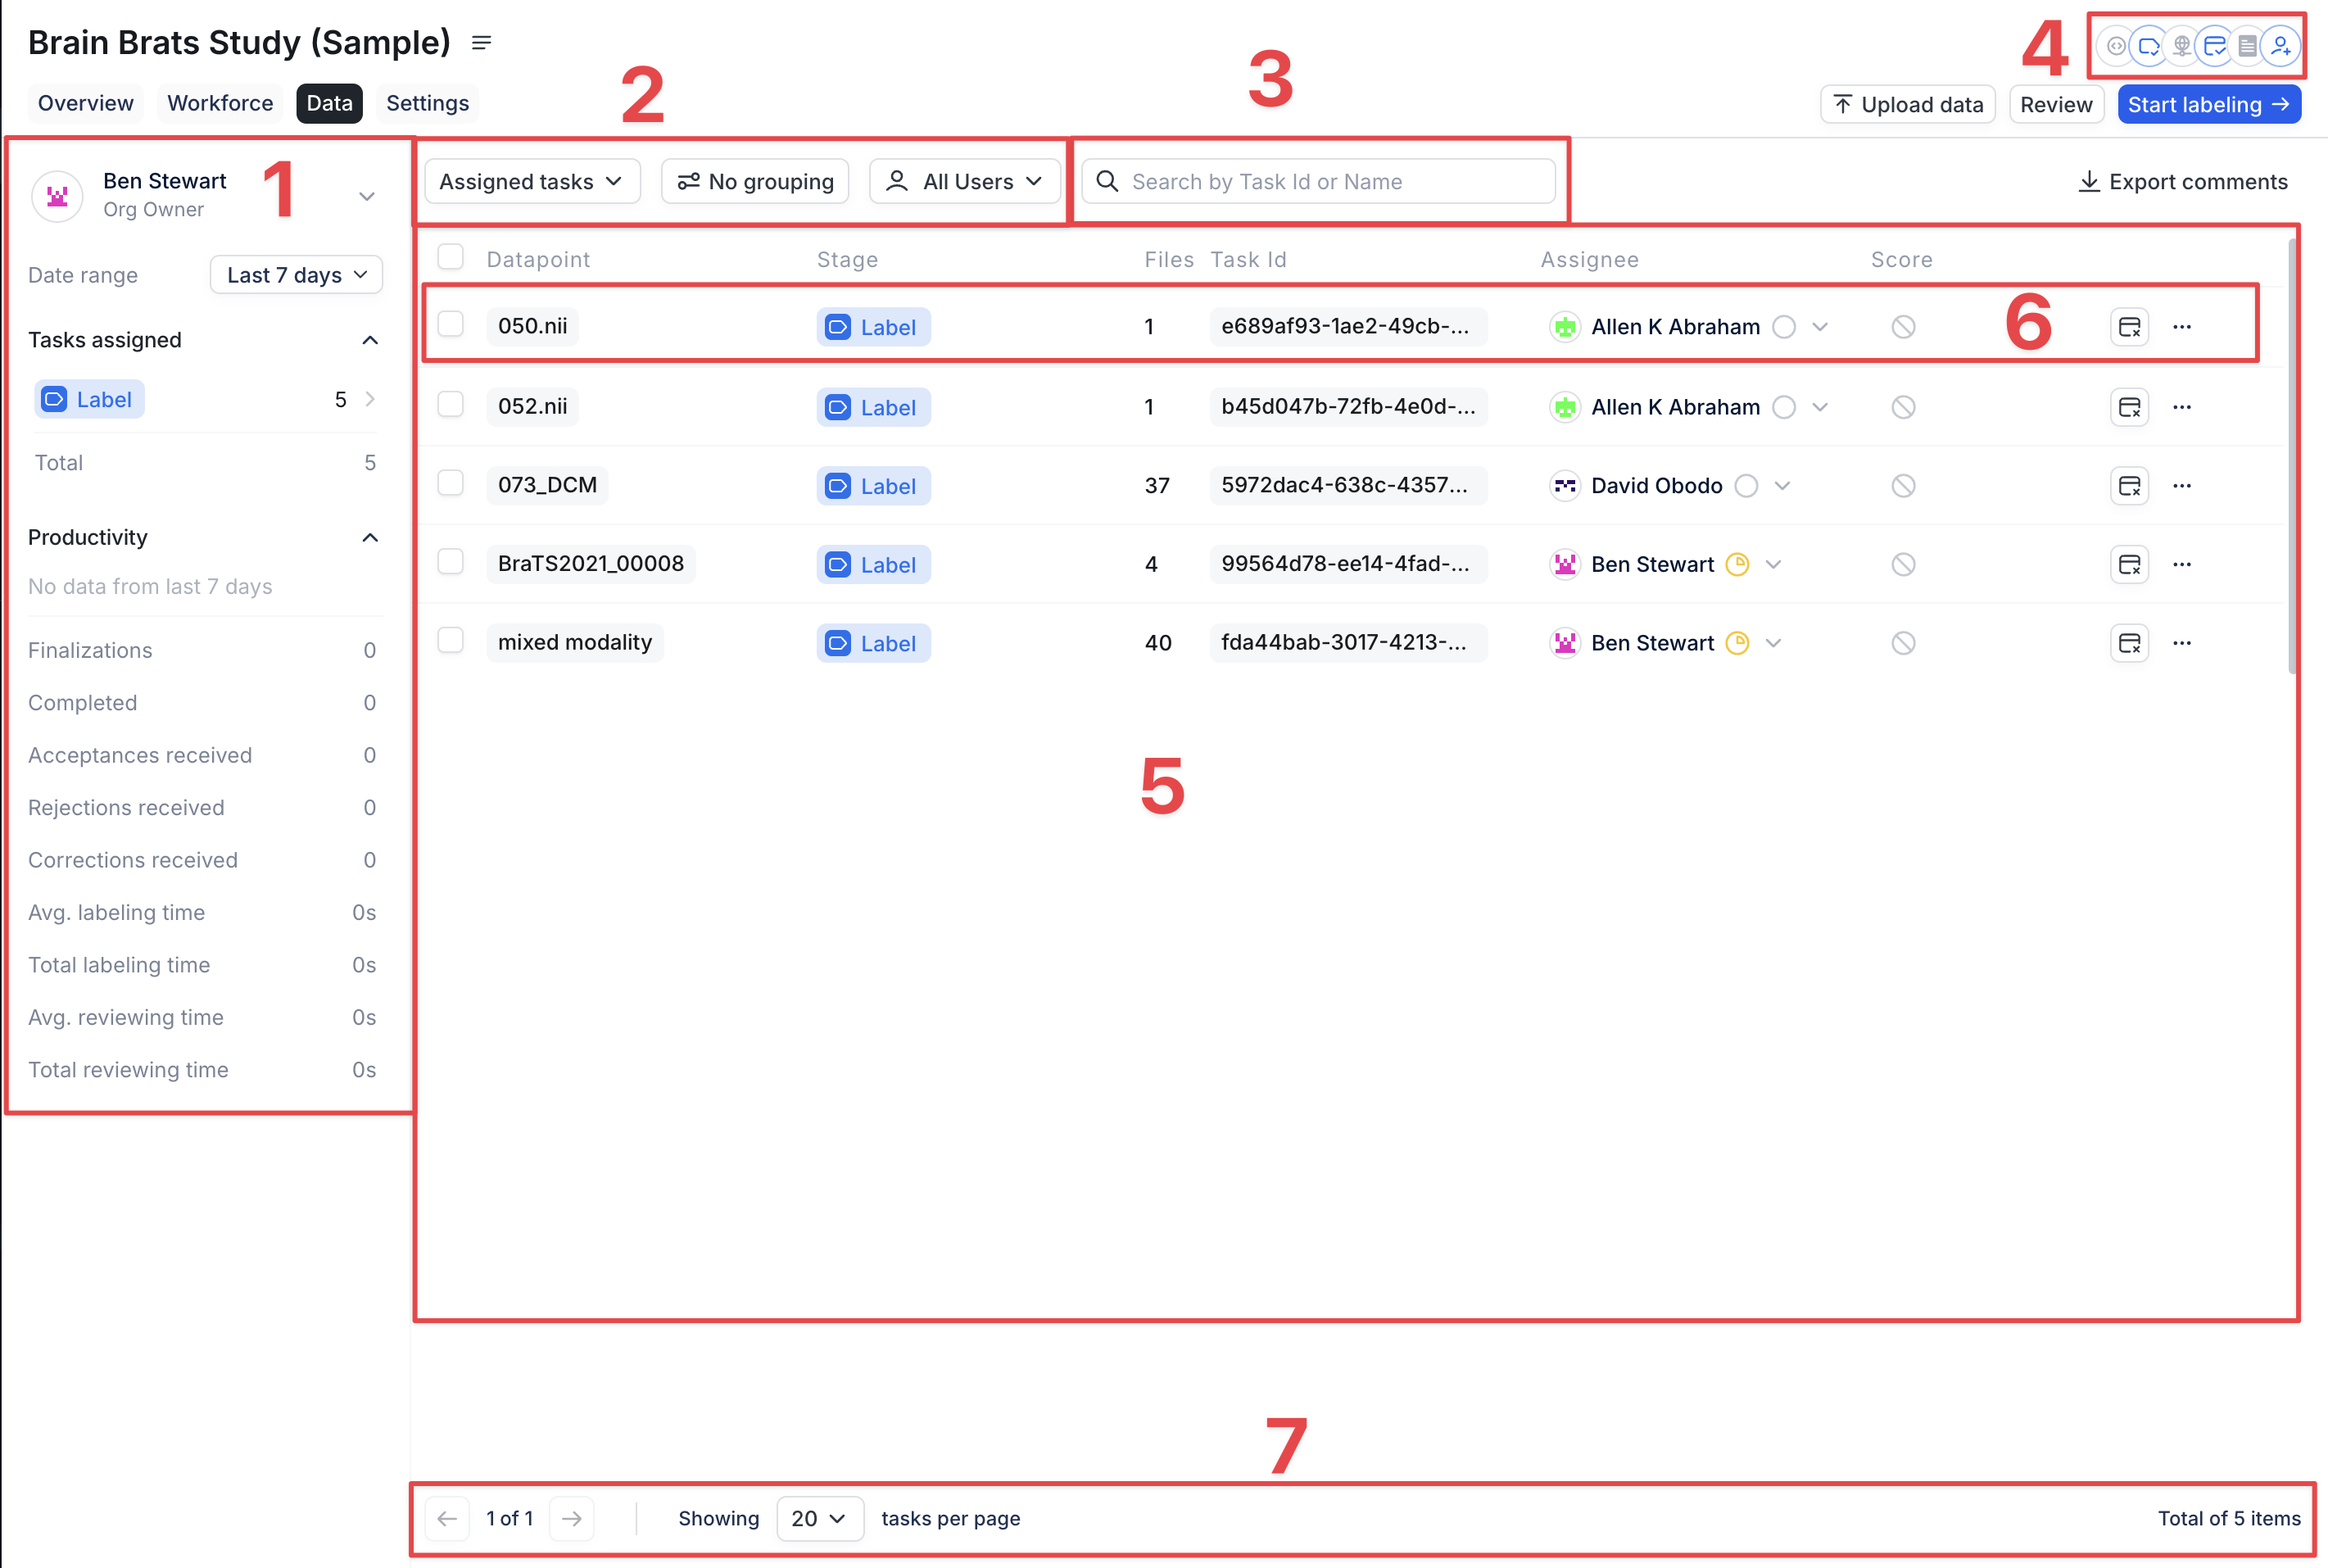
- Lefthand toolbar
- Filters
- Search bar
- Quick Settings
- Task List
- Individual Task
- Footer (and Snackbar)
Lefthand Toolbar
The lefthand toolbar has two modes, depending on how you are viewing your RedBrick AI Tasks.Analytics Mode
If you are viewing Tasks in Analytics Mode (i.e. you have not activated Folder Mode), the lefthand toolbar will display productivity information for the selected user based on the date range provided. Analytics Mode is the standard view for all Projects. Users with relevant permissions can click on the chevron next to their name to expand a list of team members that have been added to the Project Workforce.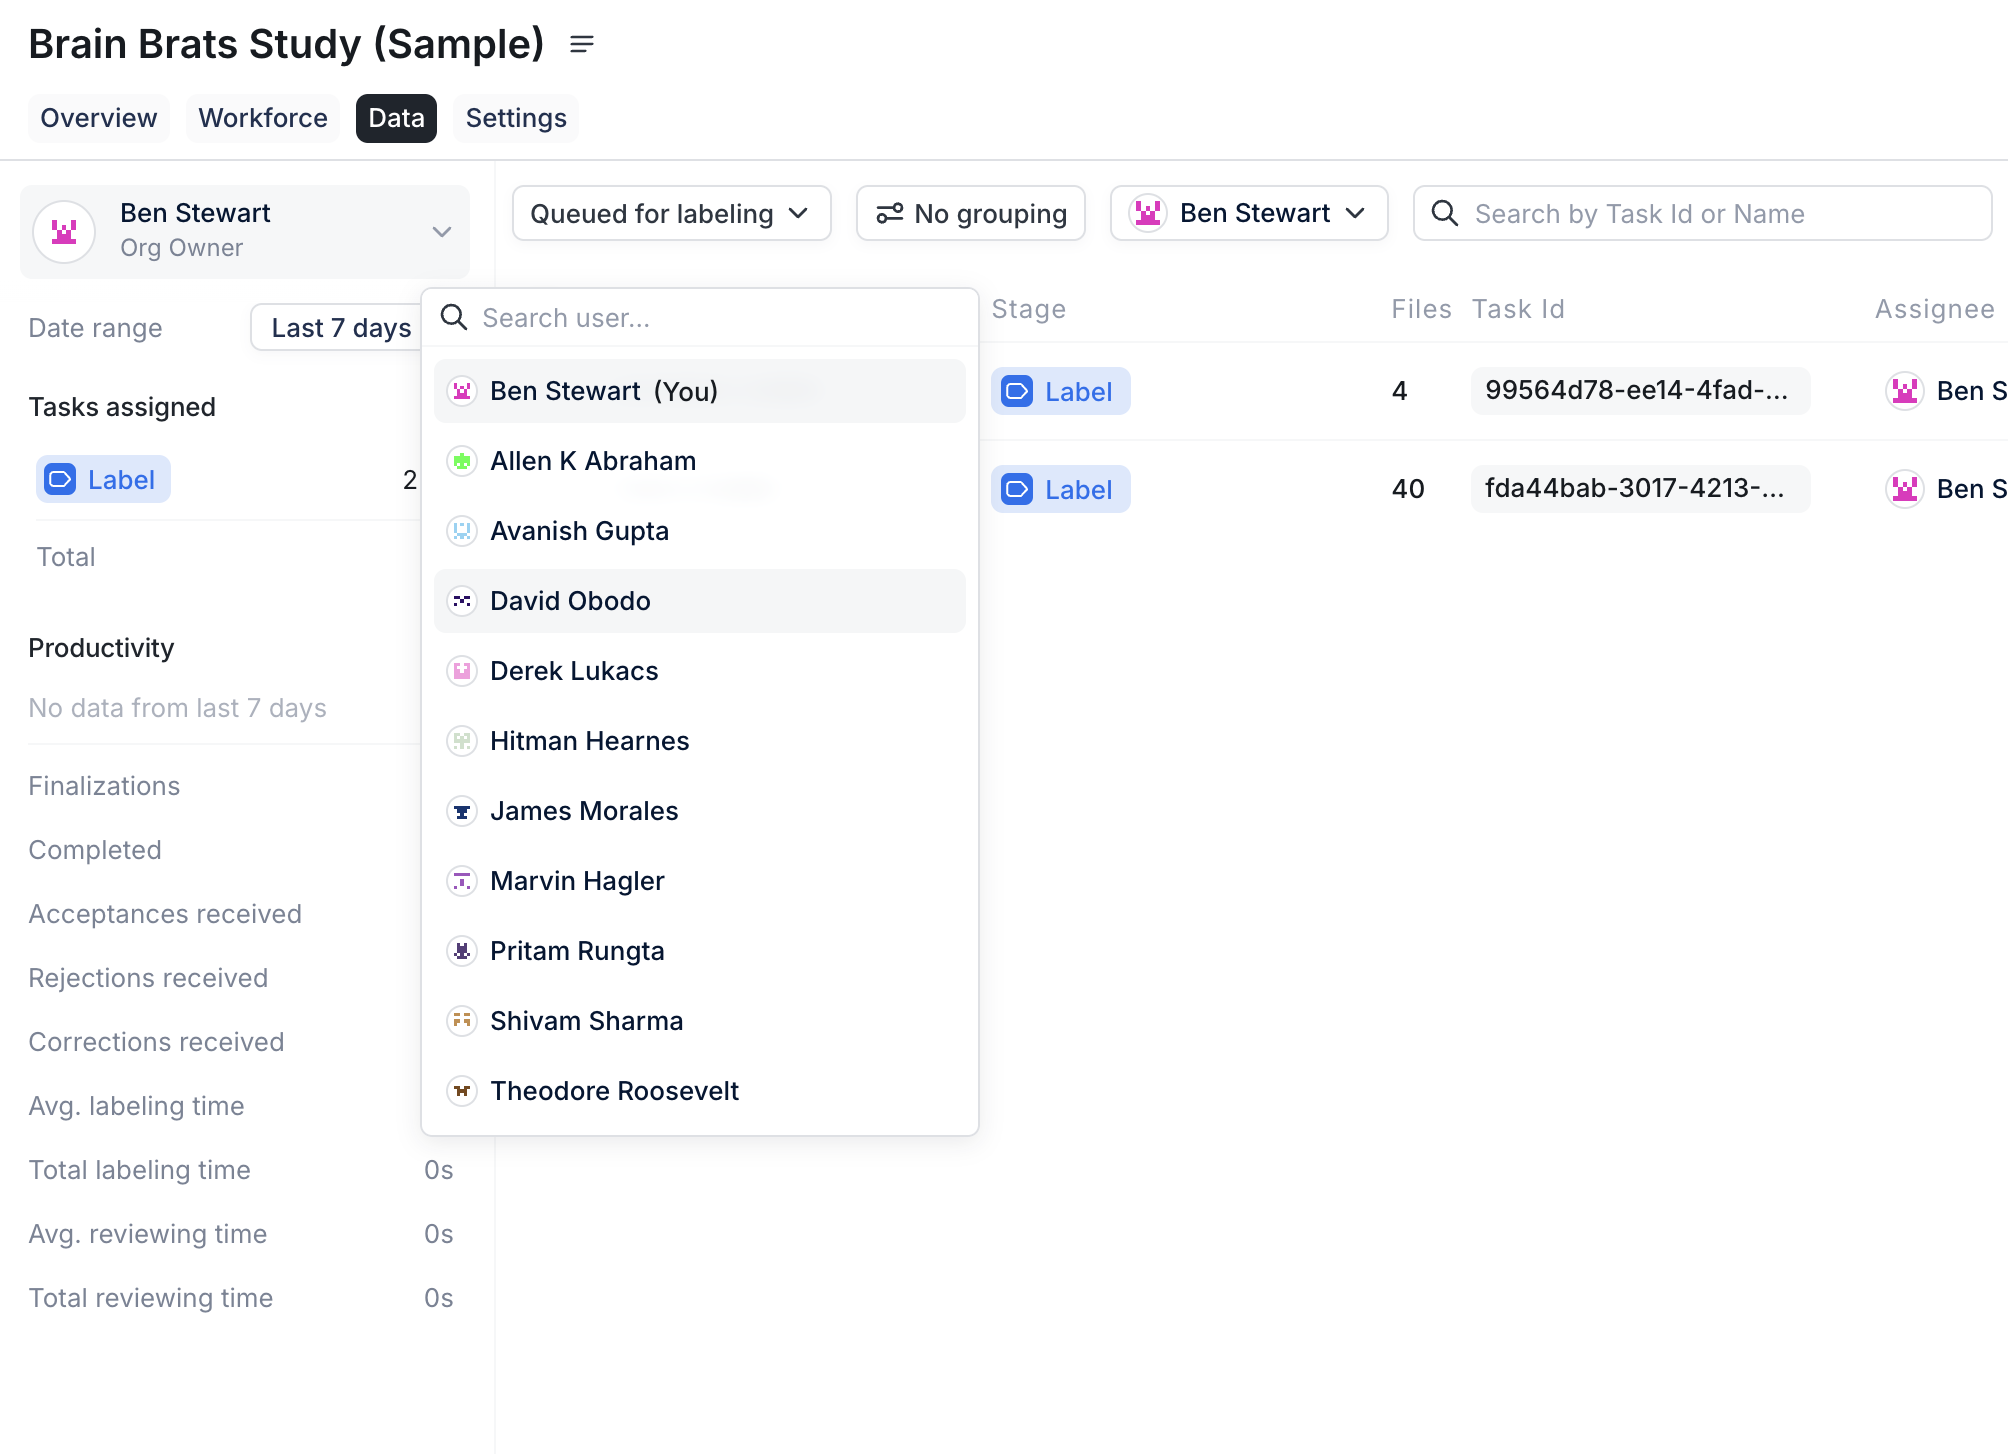
Folder Mode
Folder Mode allows you to apply verticality to your Task navigation in RedBrick AI, and easily move between subsets of your Tasks as needed based on the Task names provided on upload. When you are in Folder Mode, the lefthand toolbar will populate with all of the directories and subdirectories that were supplied in the Task upload.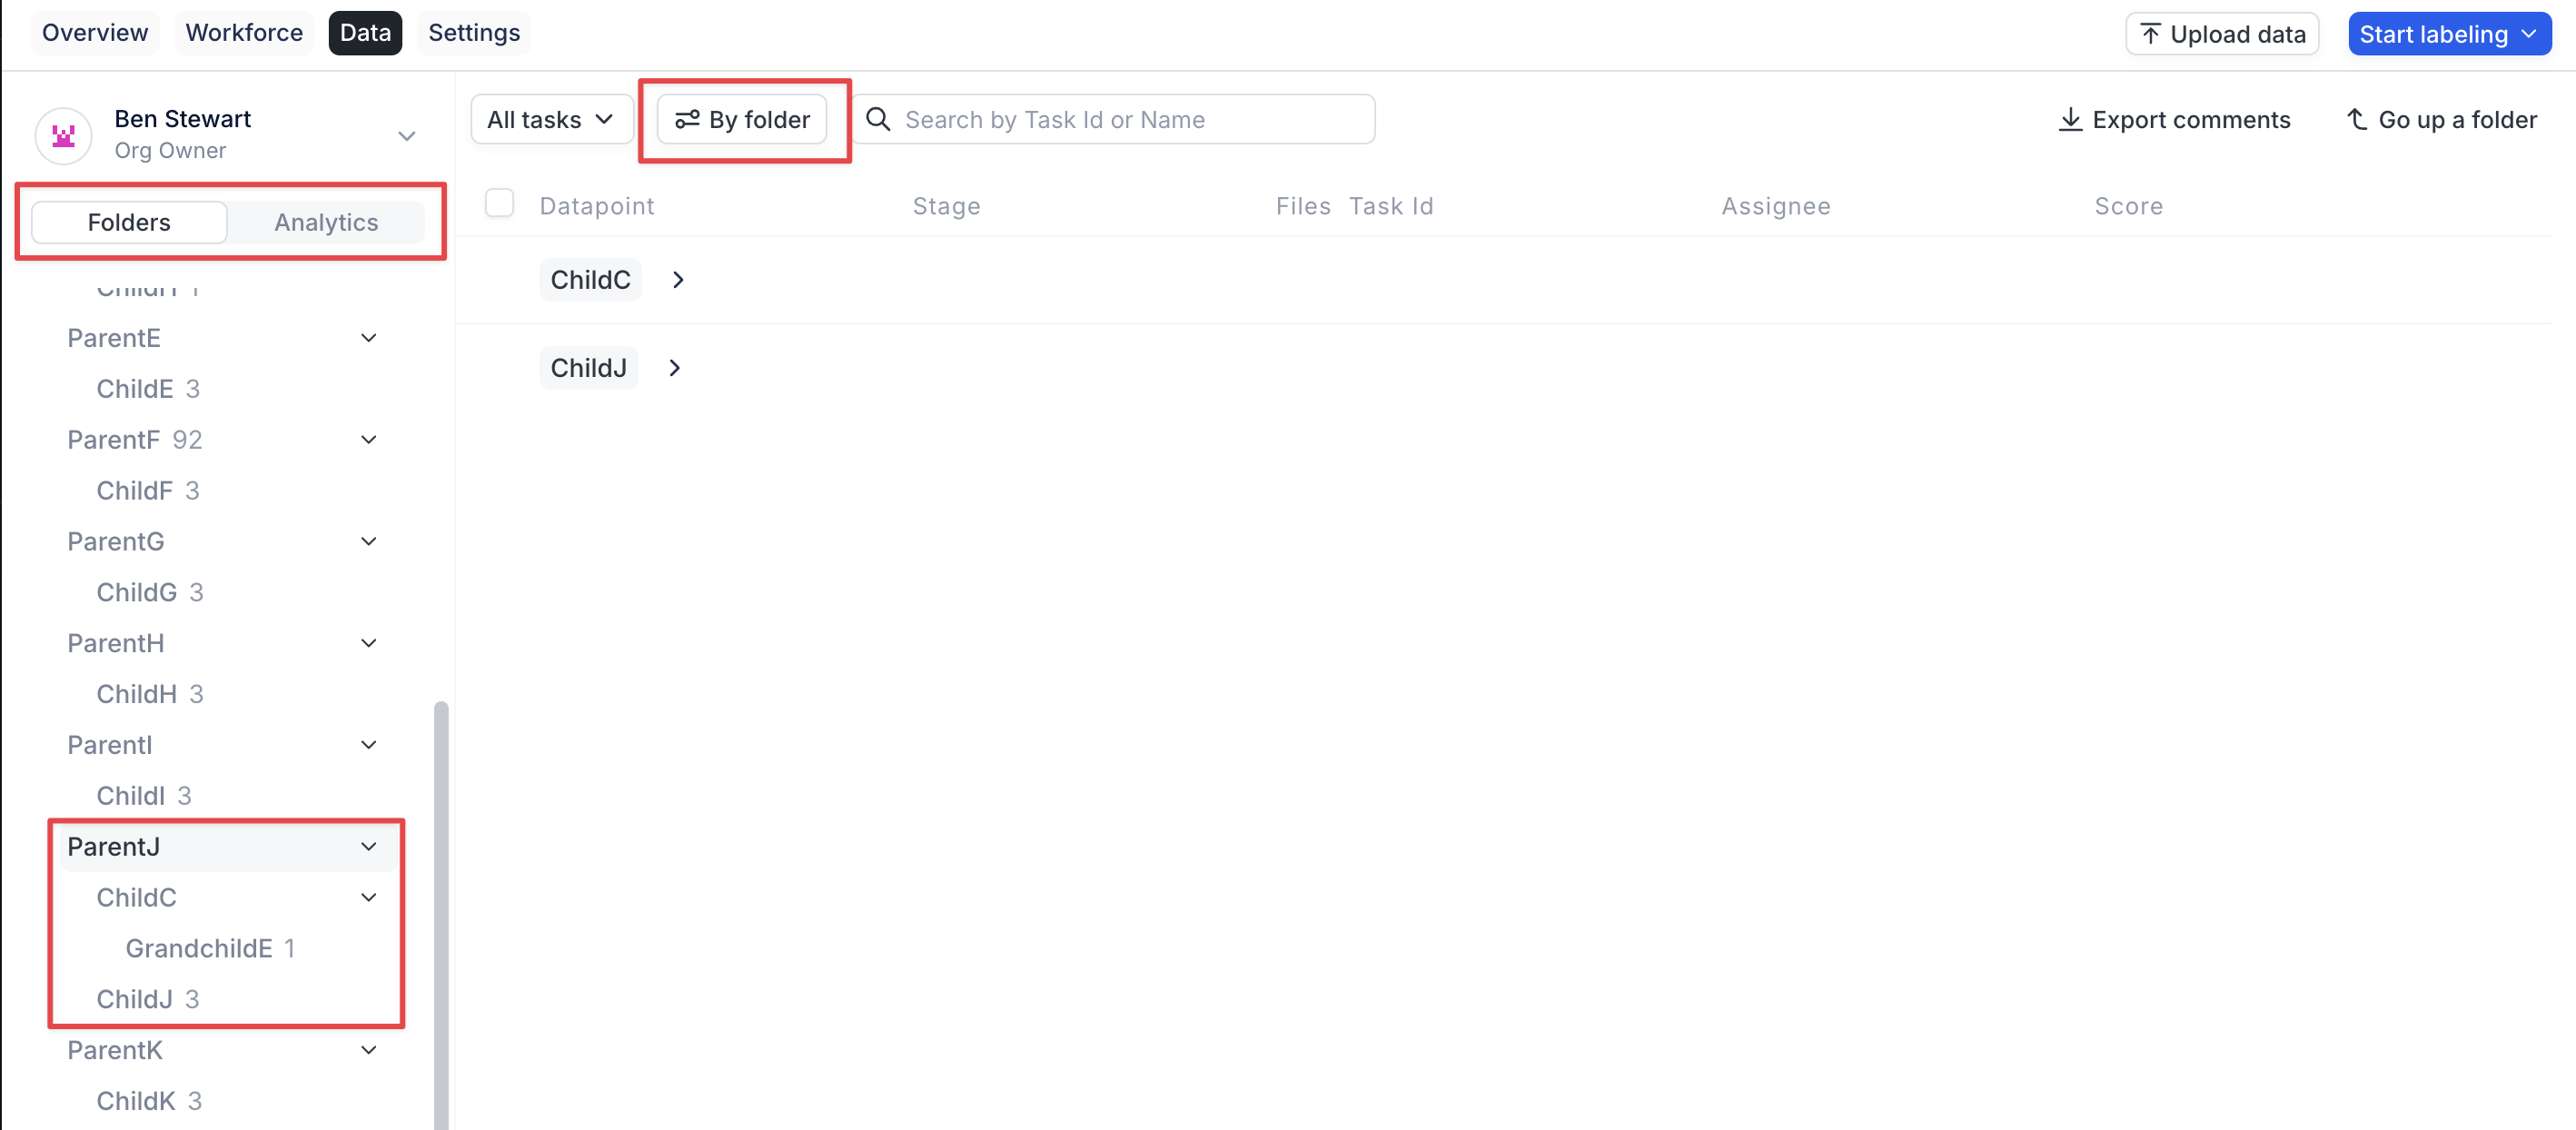
- the parent folder
ParentJcontains 1 sub-folder and 1 bottom-level folder:ChildCandChildJ, which are visible in the center of the page - Sub-folder
ChildCcontains a bottom-level folder calledGrandchildE - Bottom-level folder
GrandchildEcontains 1 RedBrick Task - Bottom-level folder
ChildJcontains 3 RedBrick Tasks
ChildJ (which can be done either in the lefthand toolbar or in the center of the page) reveals 3 Tasks:
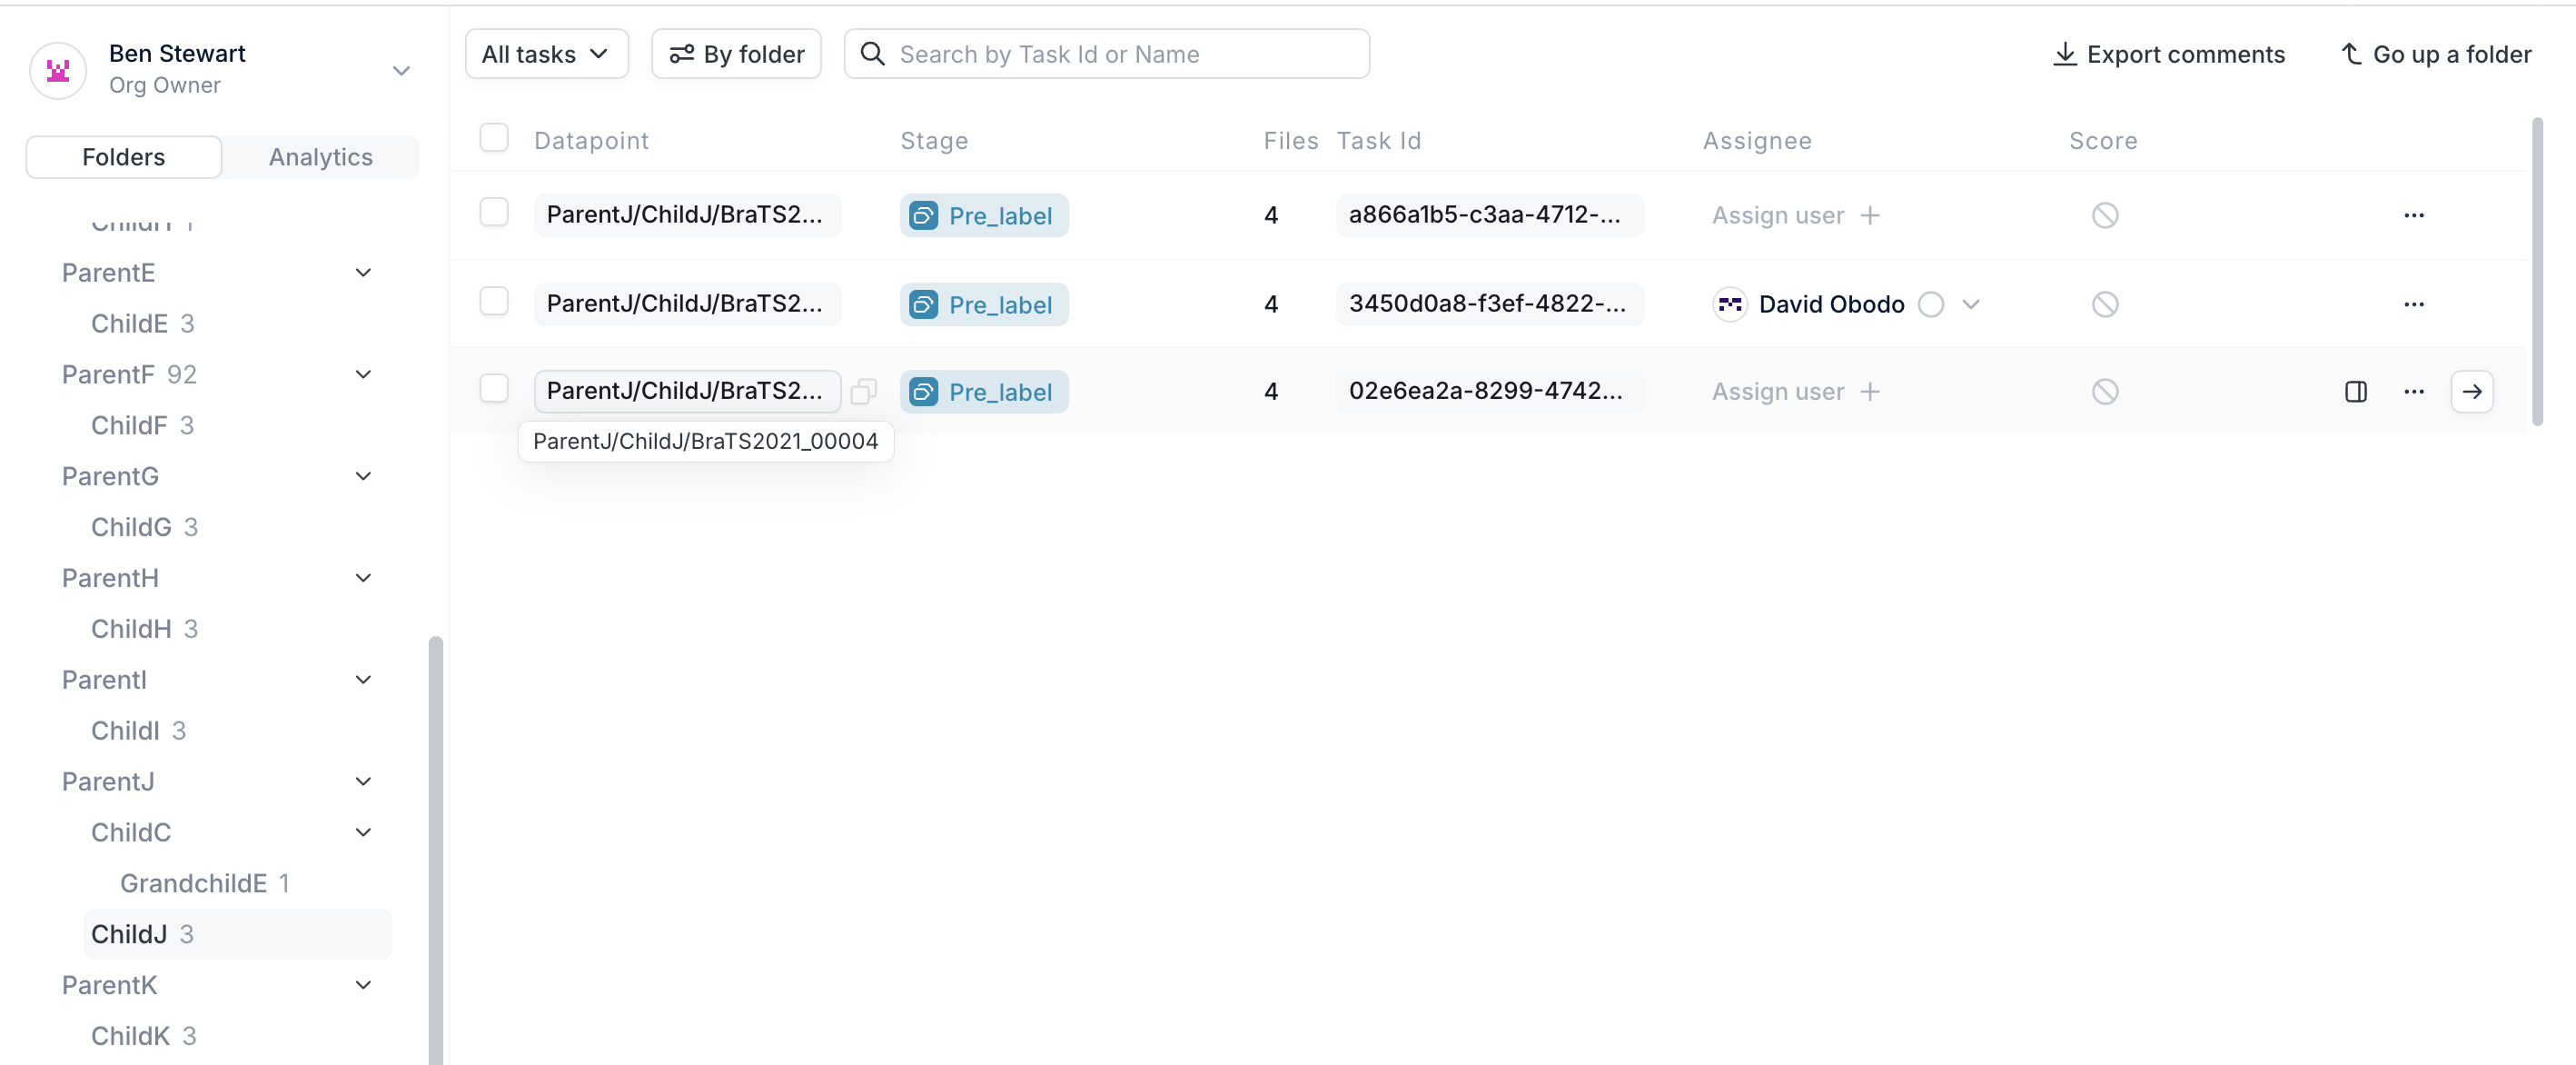
ParentJ/ChildJ/BraTS2021_00004) is visible, which also demonstrates how RedBrick creates folders based on the location of front slashes in the Task name.
Filters
RedBrick AI allows you to sort Tasks by a variety of filters based on Task state, assignment, Stage, and more. As of v1.4.0, we have greatly expanded the types of filters available on the platform. Top-Level Filters:- Object Label - search for Tasks that contain certain Object Labels from this Project’s Taxonomy
- Study Classification - search for Tasks that contain certain Object Labels from this Project’s Taxonomy
- Series Classification - search for Tasks that contain certain Object Labels from this Project’s Taxonomy
- Instance Classification - search for Tasks that contain certain Object Labels from this Project’s Taxonomy
- Task - search for Tasks based on various Task attributes
- Created at - search by date range for when a Task(s) were created
- Completed at - search by date range for when a user action pushed a Task to a subsequent Stage (e.g. Finalization in a Label Stage, Accepting in a Review Stage, etc.)
- Assigned to - search by currently assigned user or Unassigned status
- Stage - sort by the Stages available in your Project
- Task Name/ID - search by Task Name (full or partial match) or Task ID (full match)
- Review State - Passed, Failed, Corrected
- Recently Completed - True or False
- Task Status - In Progress, Contains Issue, Skipped, Revoked
- Task Presets - redirect to the RedBrick-standard Task filters (e.g. “Recently Labeled”, “Queued for review”, etc.)
A Revoked Task is any Task that has been moved via a Send to Stage operation. For Org Members, this also applies to “Task Clawback”, or returning a Task that you previously submitted into your queue.
Click on the ”+” within an active filter to expand it. Click on the ”+” next to an active filter to add another filter.

Search Bar
The Search Bar can be used to search for partial or full Task Names or Task IDs. If your team employs a standardized naming convention and stratified naming (e.g. “John_Doe/studyA/timepoint1/scan1”), a simple search is often the easiest way to display a subset of Tasks.Quick Settings
The Quick Settings icons display at the top right of each Project to give you a sense of which configurations are active in your Project. Click on any of the icons to be redirected to the corresponding Project Settings tab.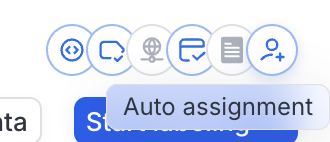
- an active Label Validation Script;
- active Hanging Protocols;
- inactive Webhooks;
- caching enabled;
- no labeling instructions provided;
- Automatic Task Assignment enabled;
Task List
The Task List is where admins can find all of a Project’s Tasks and non-admins can find Tasks that have been assigned to them. All filtering and search operations, as well as folder navigation in Folder Mode, will return results in the center of the page. Each row in the Task List represents a single Task, and there are a variety of operations and actions available to RedBrick users here.
- Datapoint - otherwise known as the Task Name. If this name is not defined by the user, RedBrick will use the name of the uploaded file;
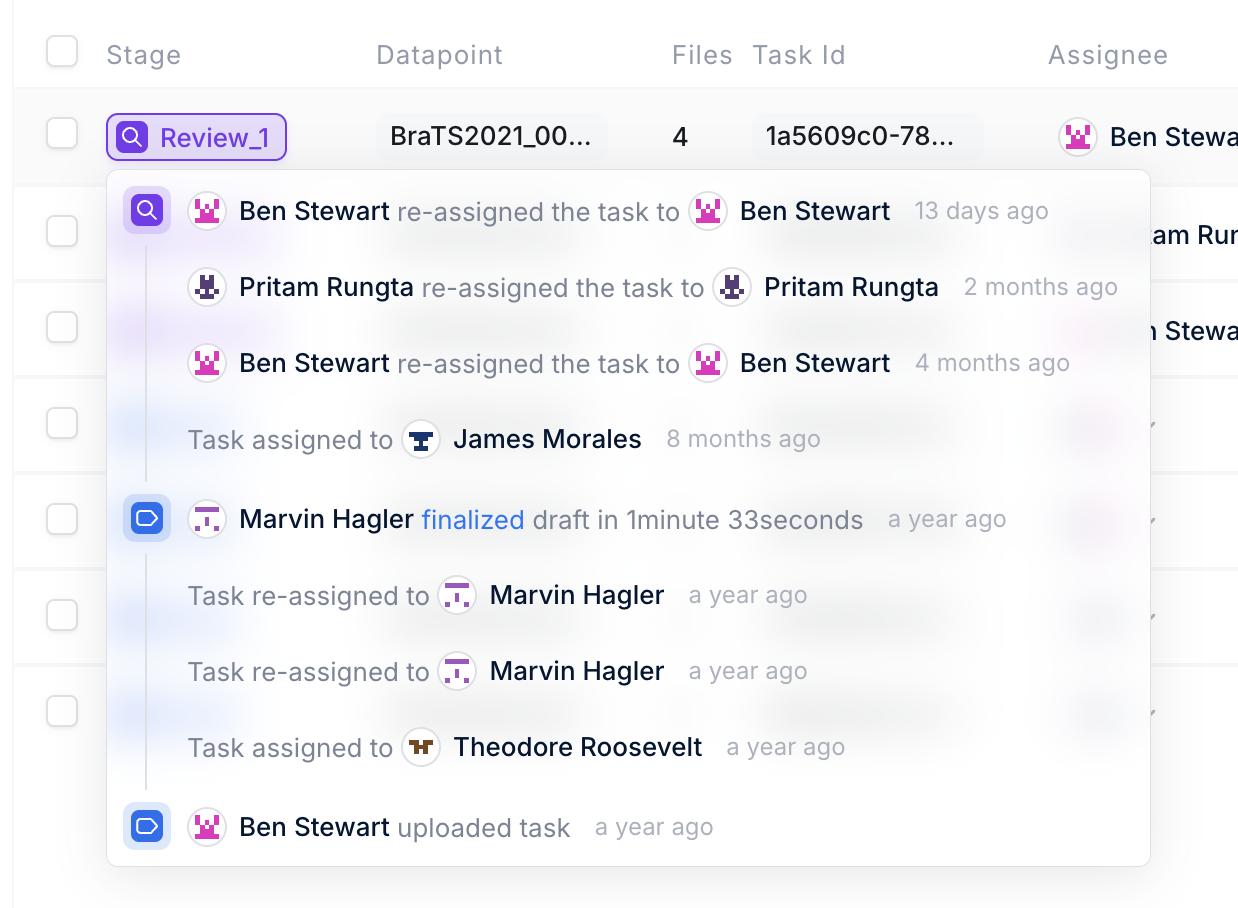
- Stage - the Task’s current location in the Project pipeline. Clicking on this icon will display the Task History for a specific Task;
- Files - the number of unique file paths associated with the Task;
- Task ID - the RedBrick-generated unique identifier for the Task, required in many SDK operations;
- Assignee - the Workforce member currently assigned to the Task;
- Score - in cases of Consensus or Labeler Evaluation Projects, a RedBrick-calculated agreement score based on the labeler’s work;
- Task Analytics (on mouse hover) - an icon that can be clicked to display a variety of metrics related to the annotation work done on the Task;
- Caching Icon - an icon that shows the Task has been cached in your local browser (and is therefore present in your Worklist). Clicking on this button will un-cache the contents of the Task from your browser;
- Three-dot Menu - an expandable dropdown menu that contains many Task-related actions;
- Go to Task button - click to open the Task in your current tab;
Task History
You can access a comprehensive list of Task events by clicking on the Task’s Stage, bringing the functionality of the Python SDK’sget_task_events() function to the Dashboard.
Three-dot Menu
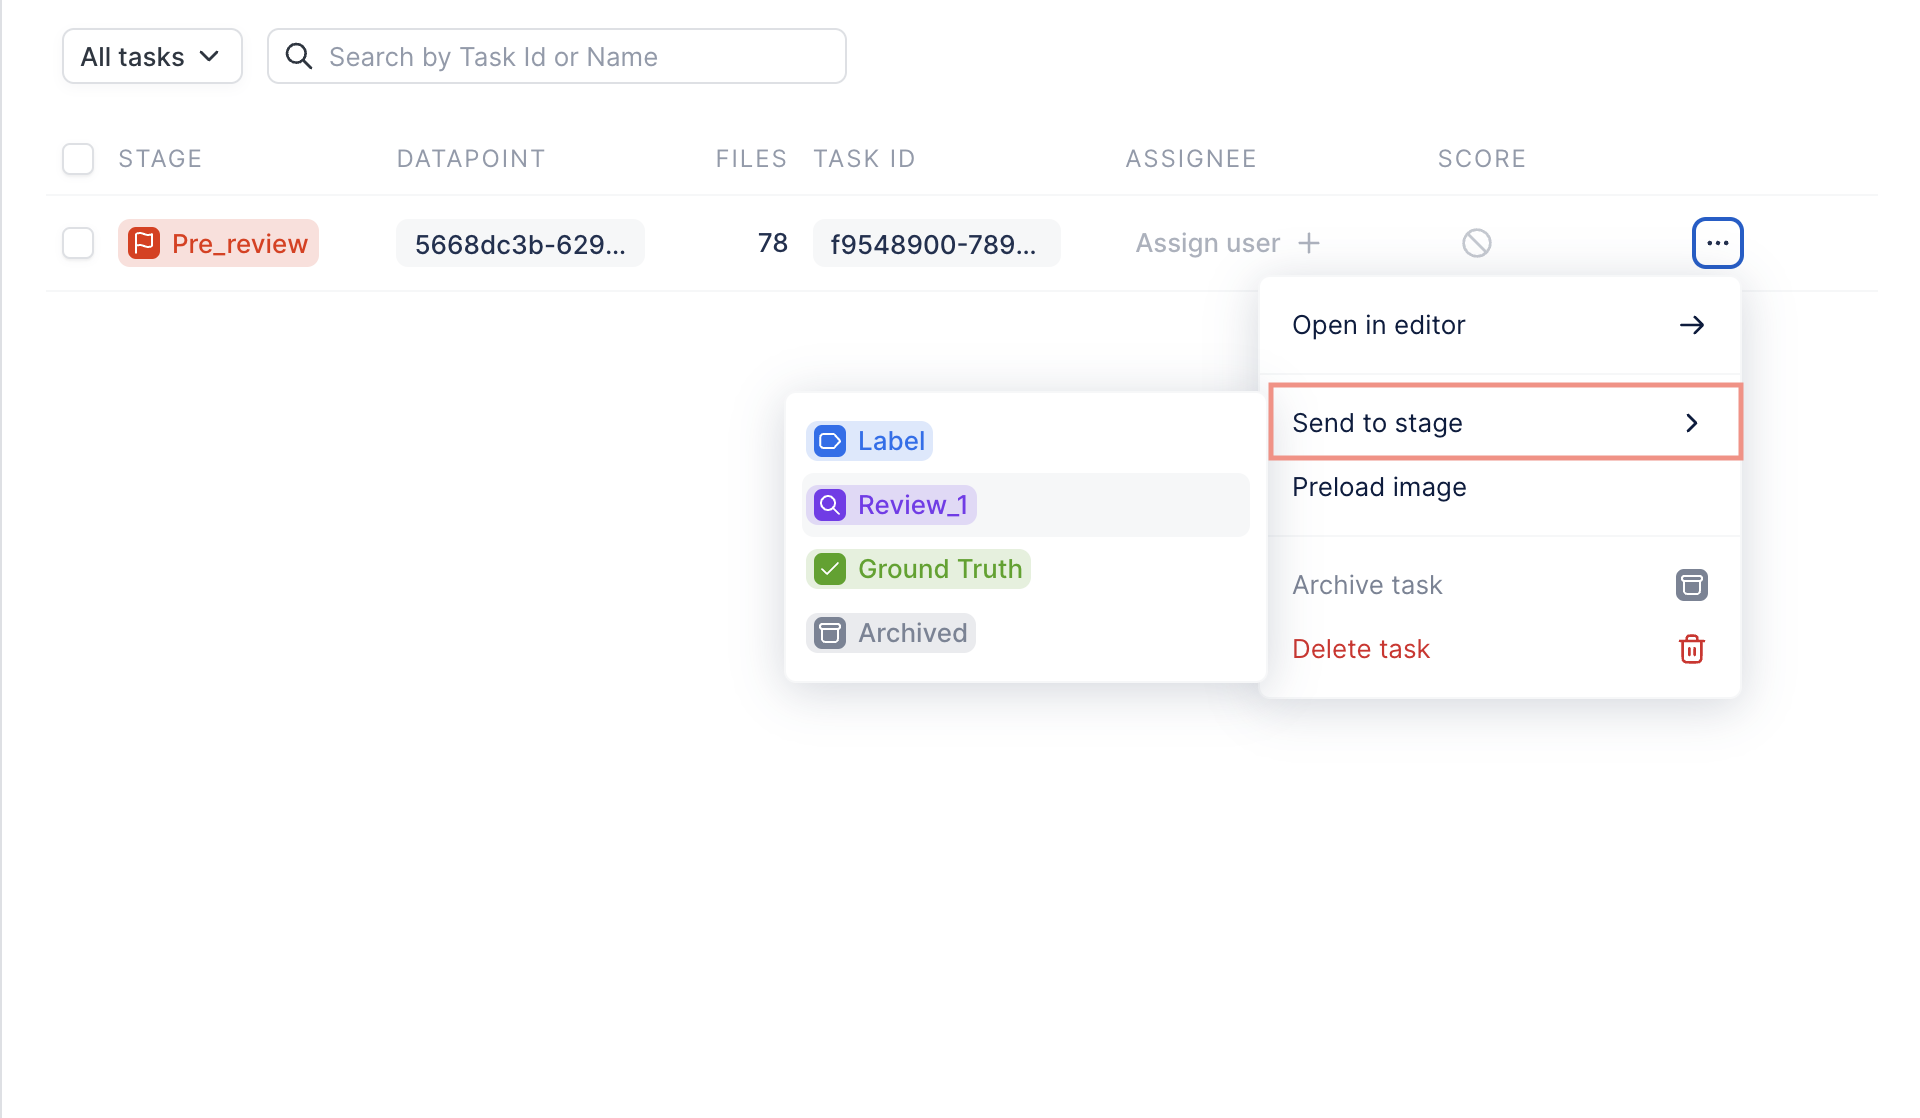
The three-dot menu on the righthand side of the Task row includes a variety of Task actions.- Open in Editor
- Send to Stage
- Cache Task
- View Task Analytics
- Export Comments
- Delete Task
- Archive Task
Send to Stage
The Send to Stage action allows the user to move a Task from one Project Stage to another, overriding the standard project workflow. Sending a Task to a different Stage may be useful if:- As a labeler, you want to make edits to a Task you have already finalized;
- As an admin, you need to return a Task to a previous Stage without sending it all the way to the beginning of your pipeline;
- As an admin, you need a Task to skip over the review pipeline you’ve established;
Footer
The Footer of the Data Page contains information about:- the number of Tasks you are currently displaying per Page;
- the Page you are currently viewing;
- the total number of Pages;
- the total number of Tasks in your Project;


