
All of the Object Labels that you created inside of your Taxonomy will display in the left side bar of the Annotation Tool. Depending on the elements you included in your Taxonomy, the left side bar will contain up to 4 sections: Study Classification, Series Classification, Instance Classification and Object Labels.Documentation Index
Fetch the complete documentation index at: https://docs.redbrickai.com/llms.txt
Use this file to discover all available pages before exploring further.
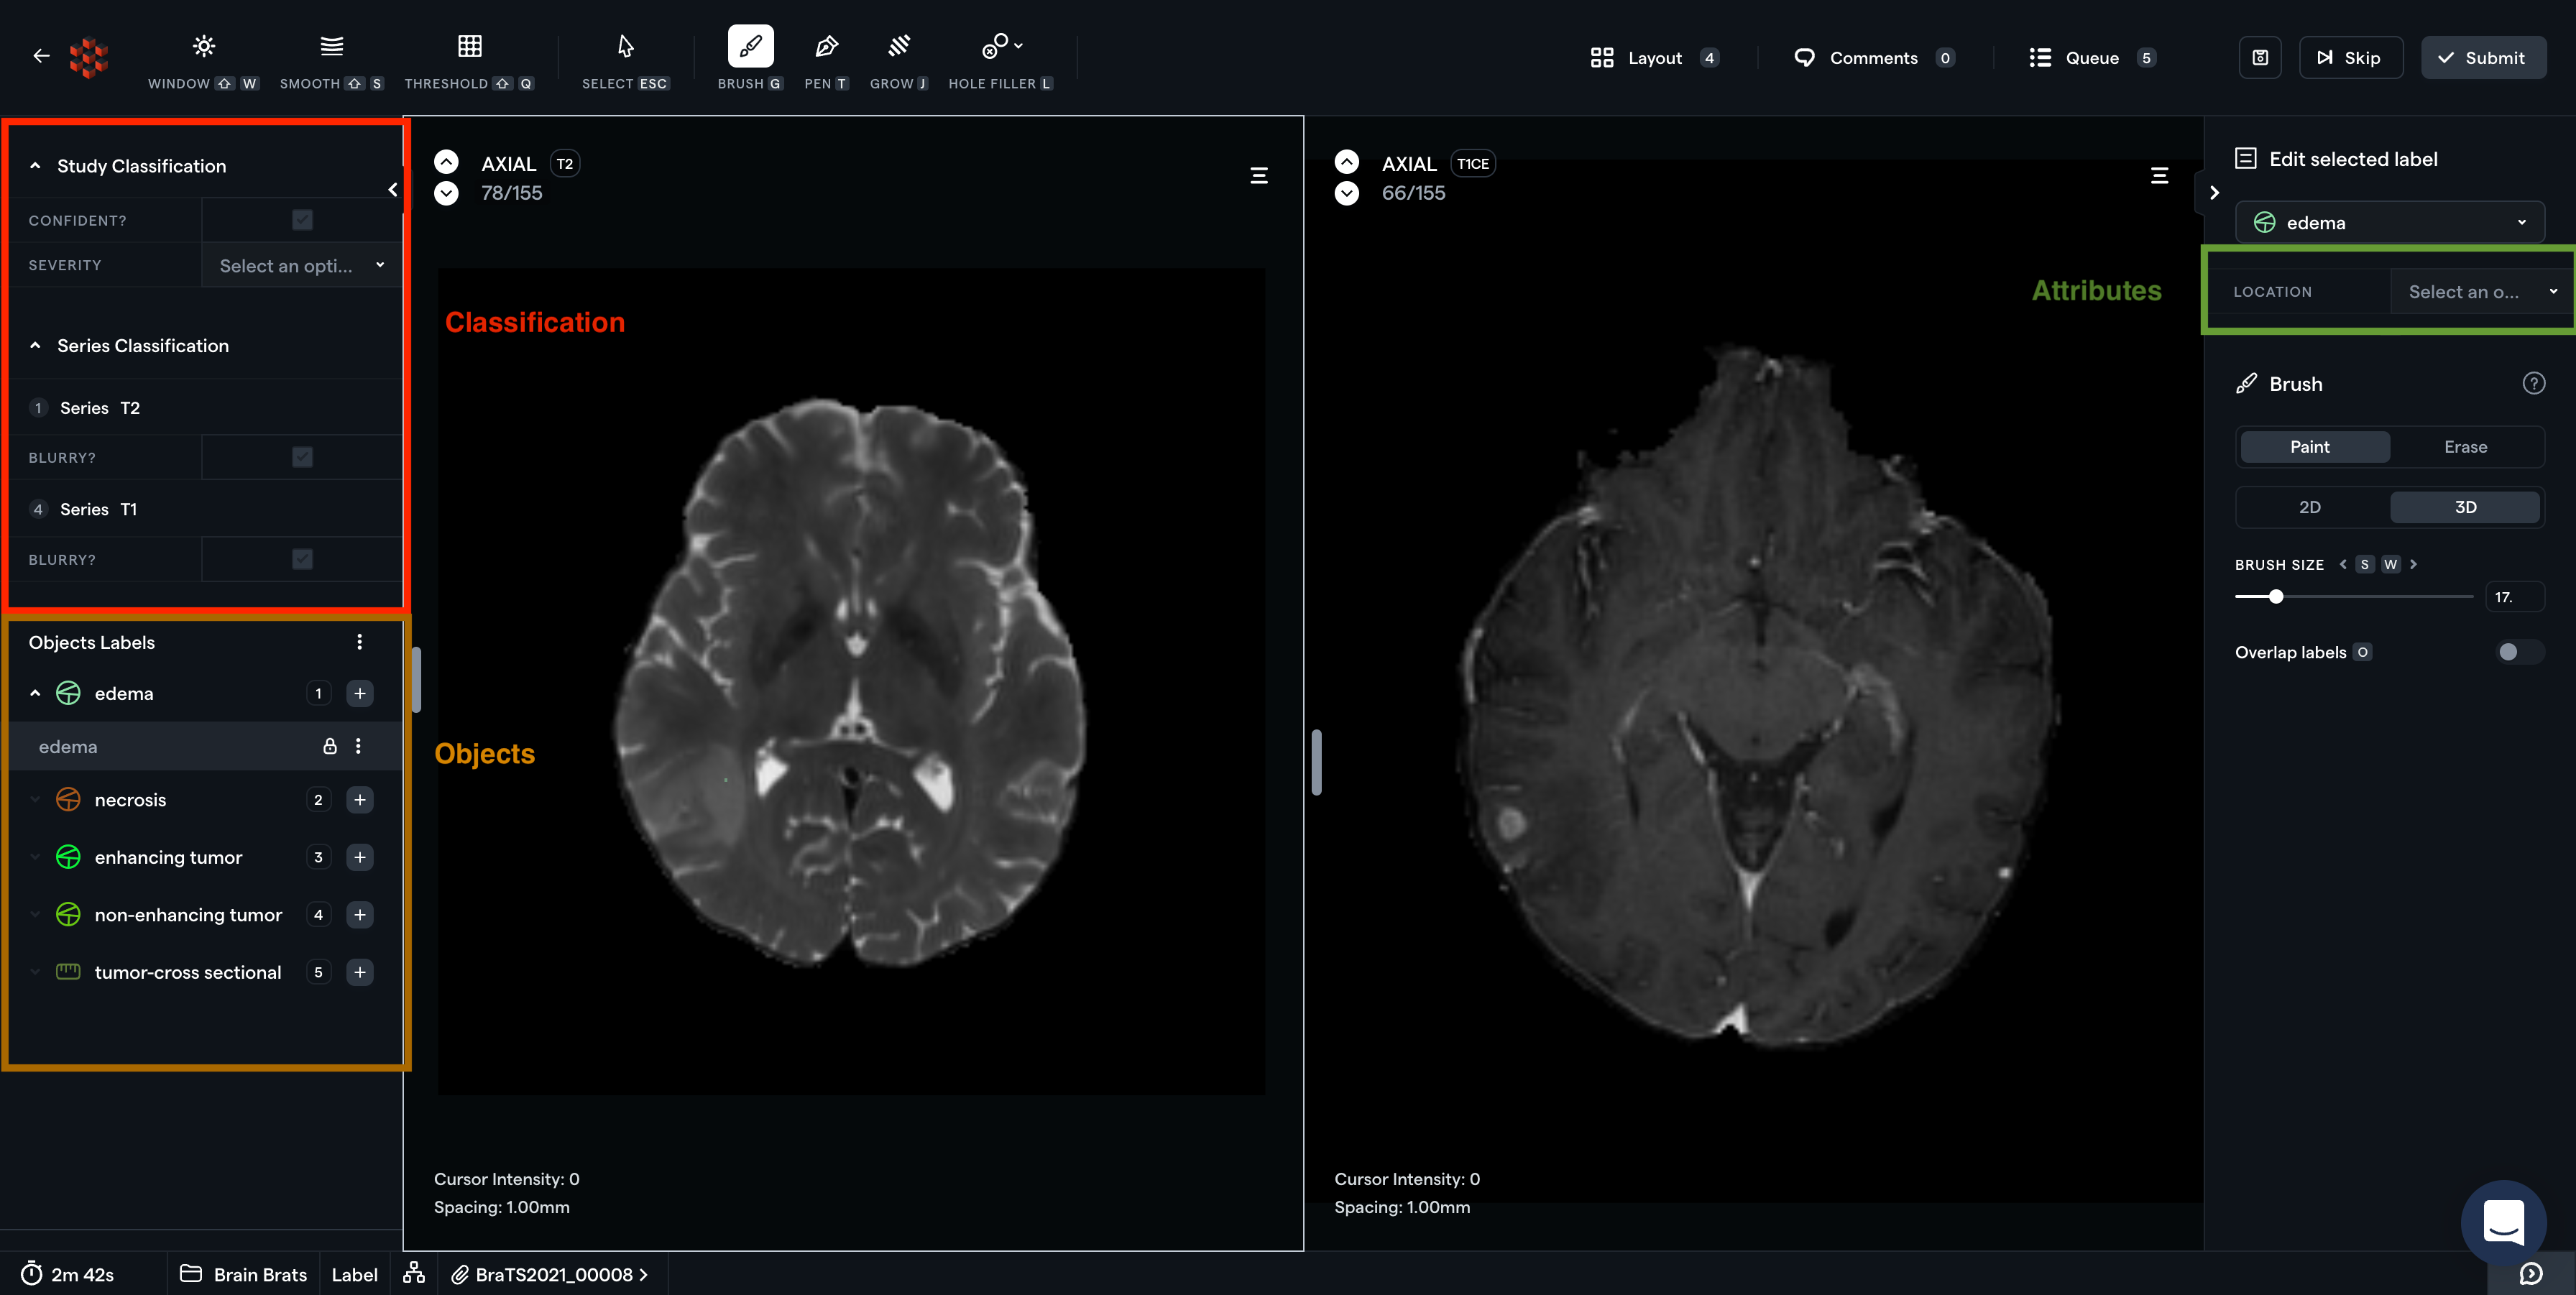
Study, Series and Instance Classification
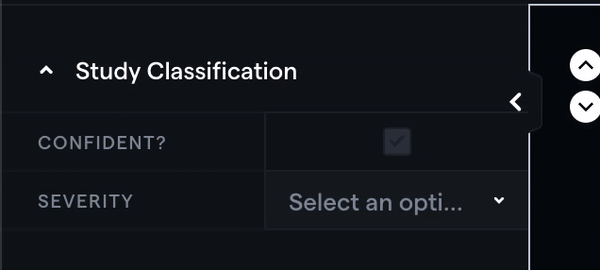
If present, your Study, Series and Instance Classifications will be present under their own expansion panels in the lefthand toolbar. Depending on the type (Boolean, Text, Select, or Multiselect), you can directly fill in the corresponding checkbox, select value, or textfield in the grid.Click and drag to adjust the size of the grid for easy interaction and viewing!
Object Labels
An Object Label has three components:- a Name (e.g. “Aortic Calcification”)
- a Type (e.g. “Segmentation”, “Polygon”, “Bounding Box”, etc.)
- Attributes (“Boolean”, “Text”, “Select” and “Multiselect”, all of which are optional)
Creating Object Labels
The left side bar will show all the Object Labels with an option to create Entities of that Object Label. There are two ways to create an Entity of an Object Label:- Click on the ”+” button next to the corresponding Object Label;
- Use the numeric hotkeys (e.g. 1, 2, 3, etc.) displayed next to the corresponding Object Label
Your default Segmentation Tool can be configured on the Tool Settings
page within your Project Settings.
segmentMap value is also generated to reflect the order in which the annotation was created.
In other words, when exporting a Task’s annotations, the first annotation created by a labeler will have a segmentMap value of “1” in the accompanying JSON file; the second annotation will have a segmentMap value of “2”, and so on. For more detailed information about how segmentations are mapped, please see our Format Reference for Exported Annotations.
The RedBrick AI SDK also supports both semantic export and exports of binary masks using the export_tasks() SDK method.
Selecting and Editing Object Labels
To edit an Object Label, you must first select it from the left sidebar. Once you select the Entity from the left side bar, the default tool for that label type will be selected automatically, and you can interact with the canvas to apply edits to that Entity.When an Object Label Entity is selected, all interactions with the canvas will only modify that
particular Entity.
Other Object Label Actions
There are several actions available that are designed to make selecting, viewing, and editing Object Labels as easy as possible for labelers and reviewers. To access all actions, click the three-dot menu button on a Label Entity.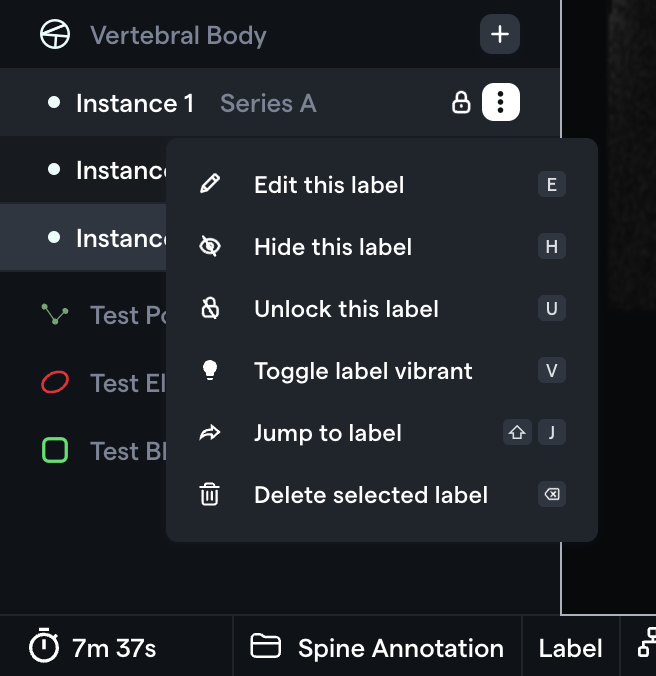
Editing a Selected Label and Attributes
You can quickly swap between existing Labels of the same Type (i.e. all of your Segmentation Object Labels, all of your Polygon Object Labels, all of your Bounding Boxes, etc.) in the right side context panel. To reveal this menu in the right hand Context Panel, either click on the Object Label in the viewport or use the “Edit” label action. With the Context Panel open, you can also add, modify, and delete Attributes for an Object Label.delete / backspace hotkey. Alternatively, you can use the Delete Action in the actions dropdown.
To delete all Labels, use the shortcut shift + delete/shift + backspace.
The Delete All Labels action cannot be undone. Please ensure that you wish to irrecoverably
delete the most recent version of all of your labels before using the Delete All Labels action.
Hide and Show Labels
You can hide the label you are currently hovering over by using theh hotkey. If you are not hovering over a label (either on the canvas or on the left side bar), the h hotkey will hide/show the currently selected label.
To hide/show all labels use the shortcut shift + h or the hide all action in the Object Labels three dot menu dropdown.
Lock and Unlock Labels
You can lock/unlock the label you are currently hovering over by using theu hotkey. If you are not hovering over a label (either on the canvas or in the left side bar), the u hotkey will lock/unlock the currently selected label.
To lock/unlock all labels, use the shortcut shift + u or the Lock All Action in the Object Labels three-dot menu dropdown.
Watch the video below to understand how to prevent/allow the overwriting of annotations.
v shortcut to activate Vibrant Mode to highlight that Entity.
Jump to Label
The Jump to Label Action will change the current slice position to the closest slice position that contains a particular annotation. This is useful for revealing annotations on the canvas.Label Grouping
RedBrick allows you to create logical groups of existing Object Labels, which will all share a common identifier (group?: string) in the tasks.json file generated upon export.
Creating a Label Group
- With an Object Label selected, press the Link Label button or use the
CTRL/CMD+Lhotkey to activate Link Mode. - With Link Mode enabled, use
LMBto select any Object Label in the viewports or the lefthand toolbar to create a Label Group. - Repeat as desired.
Modifying and Deleting a Label Group
- Click on the Delink button next to any Object Label in a Label Group to remove it from the Label Group.
- To delete a Label Group, delink all of the Object Labels in the Group.
Each Object Label Entity can only be a part of one Label Group!
Read-only Labels
Read-only labels are special Object Labels that have been uploaded to a Task but cannot be edited. Optionally, Project & Org Admins can determine which user permission level can remove a label’s read-only status in Project Settings -> General Settings. By default, no user can toggle a label’s read-only status in the Dashboard and Editor. In the Editor, read-only labels are represented by a unique “crossed-out pencil” icon.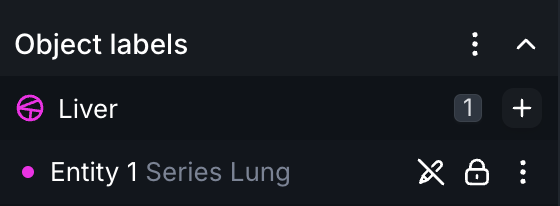
Uploading Read-only Labels
As with all annotation imports, designating a label as read-only and uploading it to RedBrick must be done programmatically. Please see the following JSON snippet for an example of the relevant code:Setting Permissions for Read-only Labels
In your Project Settings -> General Settings, you can determine which user permission level is required to toggle the read-only status of a Read-only Label. This setting can be configured for each Stage of your Project and allows for the construction of more advanced QA flows.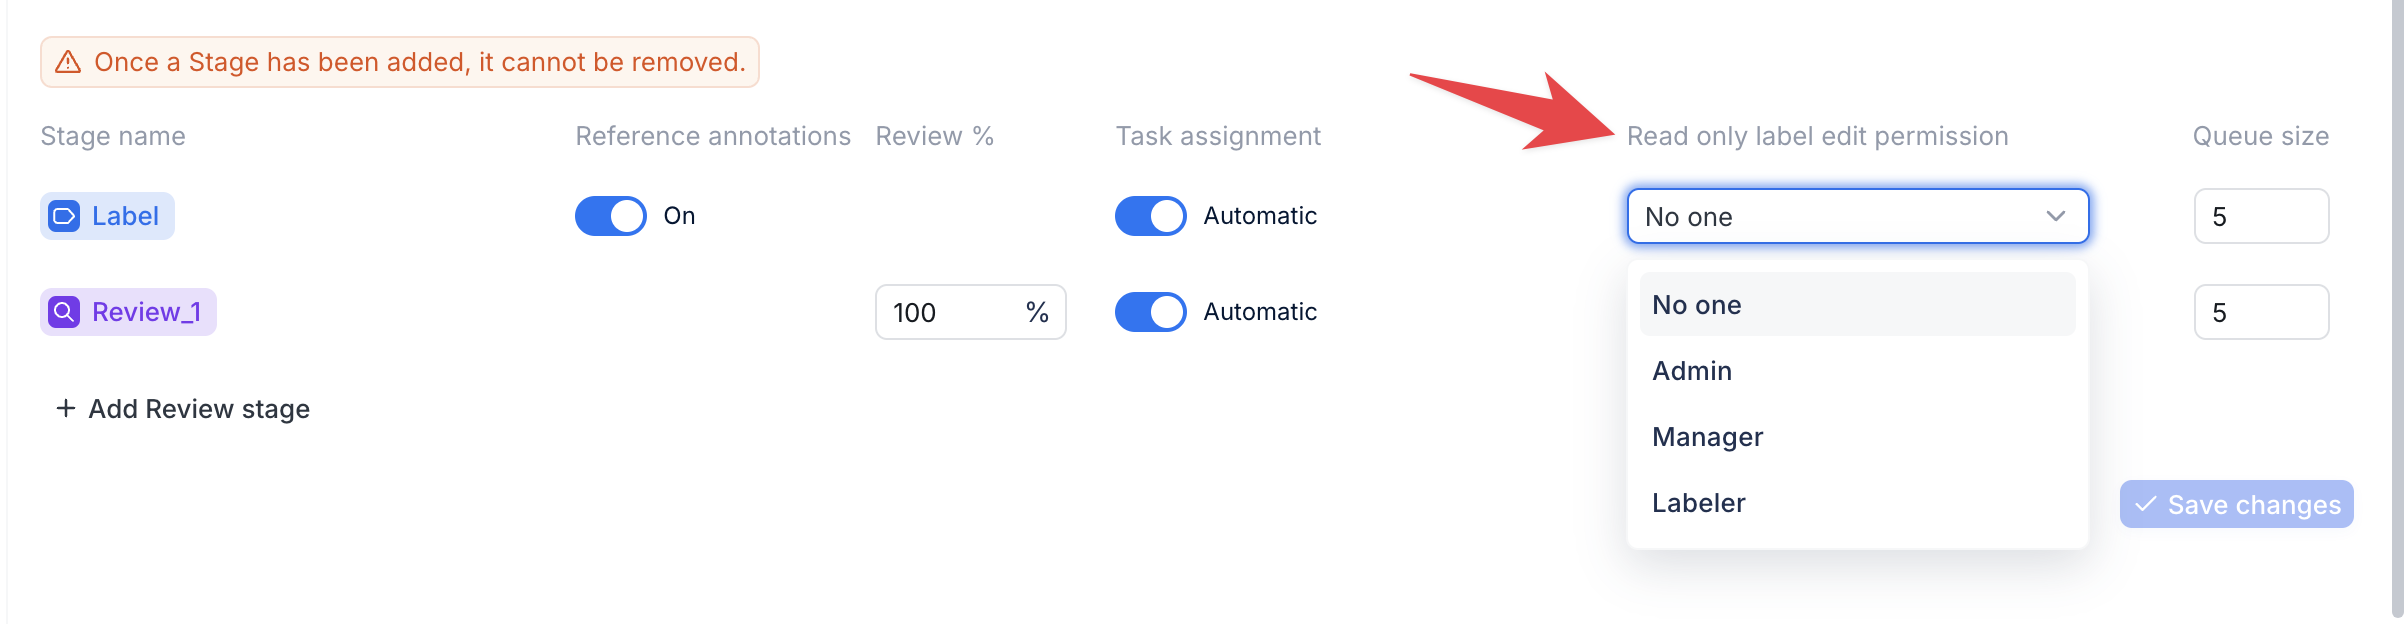
- No one - no users can toggle the status of a Read-only Label
- Admin - Project Admins (and higher) can toggle the status of a Read-only Label
- Manager - Project Managers (and higher) can toggle the status of a Read-only Label
- Labeler - Project Members (i.e. all users with access to this Project Stage) can toggle the status of a Read-only Label
Example QA Flow 1 - Limited Review Stage
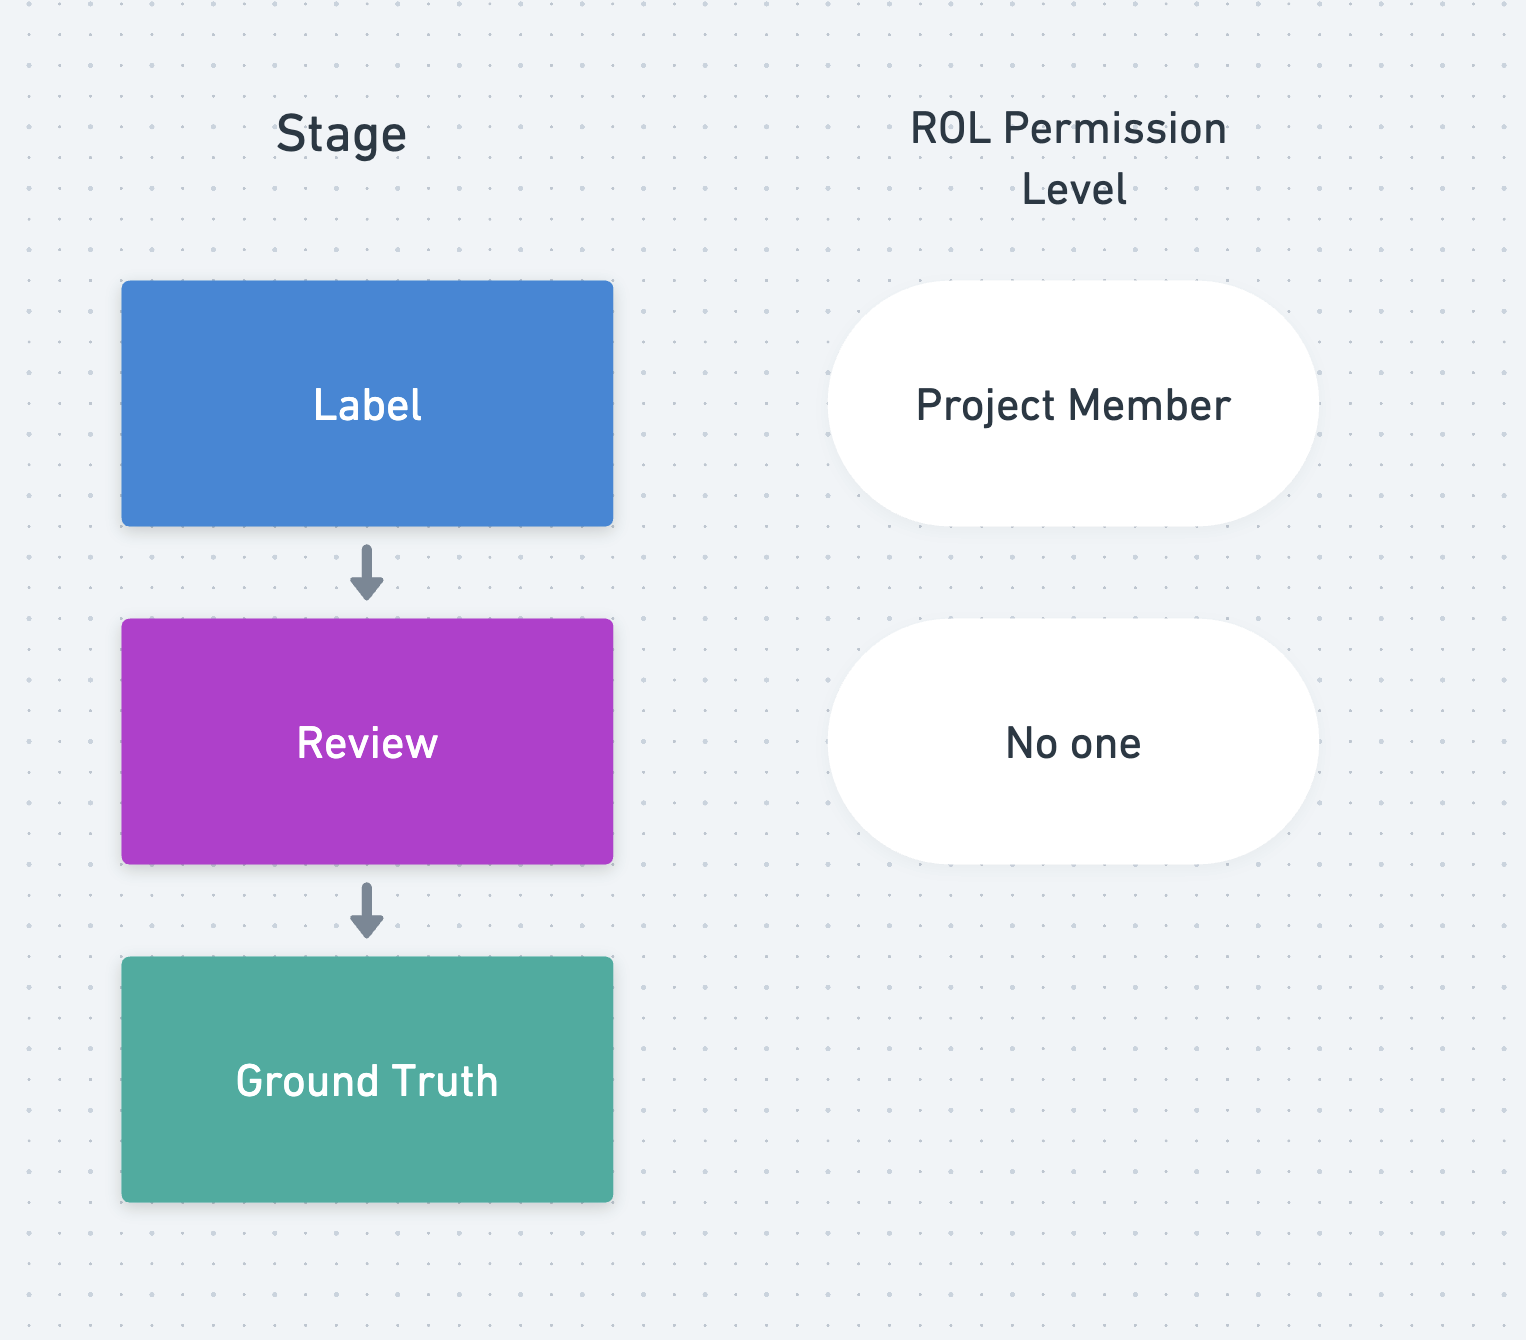
Example QA Flow 2 - Iterating over a large dataset
- upload Labels A and B for reference while preventing them from being edited by the annotators
- allow the annotators to generate new annotations (or modify existing ones) for Label C
- allow Admins to correct any labels if inconsistencies are found in the Review Stage
Annotation Version Explorer
RedBrick AI’s Version Explorer allows you to reference (and, if necessary, restore) previous versions of your annotations within the Annotation Tool. To reference a previously saved set of annotations, click on the Version Explorer button in the top right corner of the screen. The Version Explorer will then display in the right hand Context Panel, allowing you to access previously saved versions of your annotations.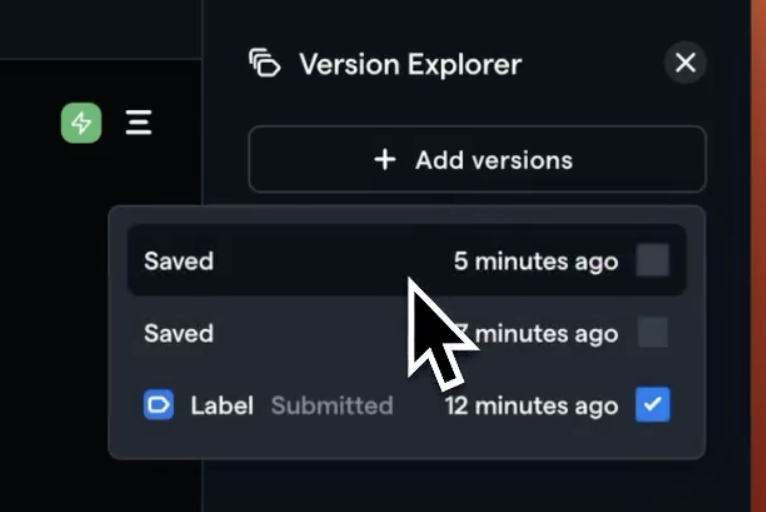
- Force a save of the most current set of annotations;
- Duplicate the older version of annotations and create a new version based on that duplicate.