Creating a Project: Step by Step

Step 1: Specify a Unique Project Name
Each Project has a unique name that can be changed at any time within Project Settings;Step 2: Select the Taxonomy for your Project
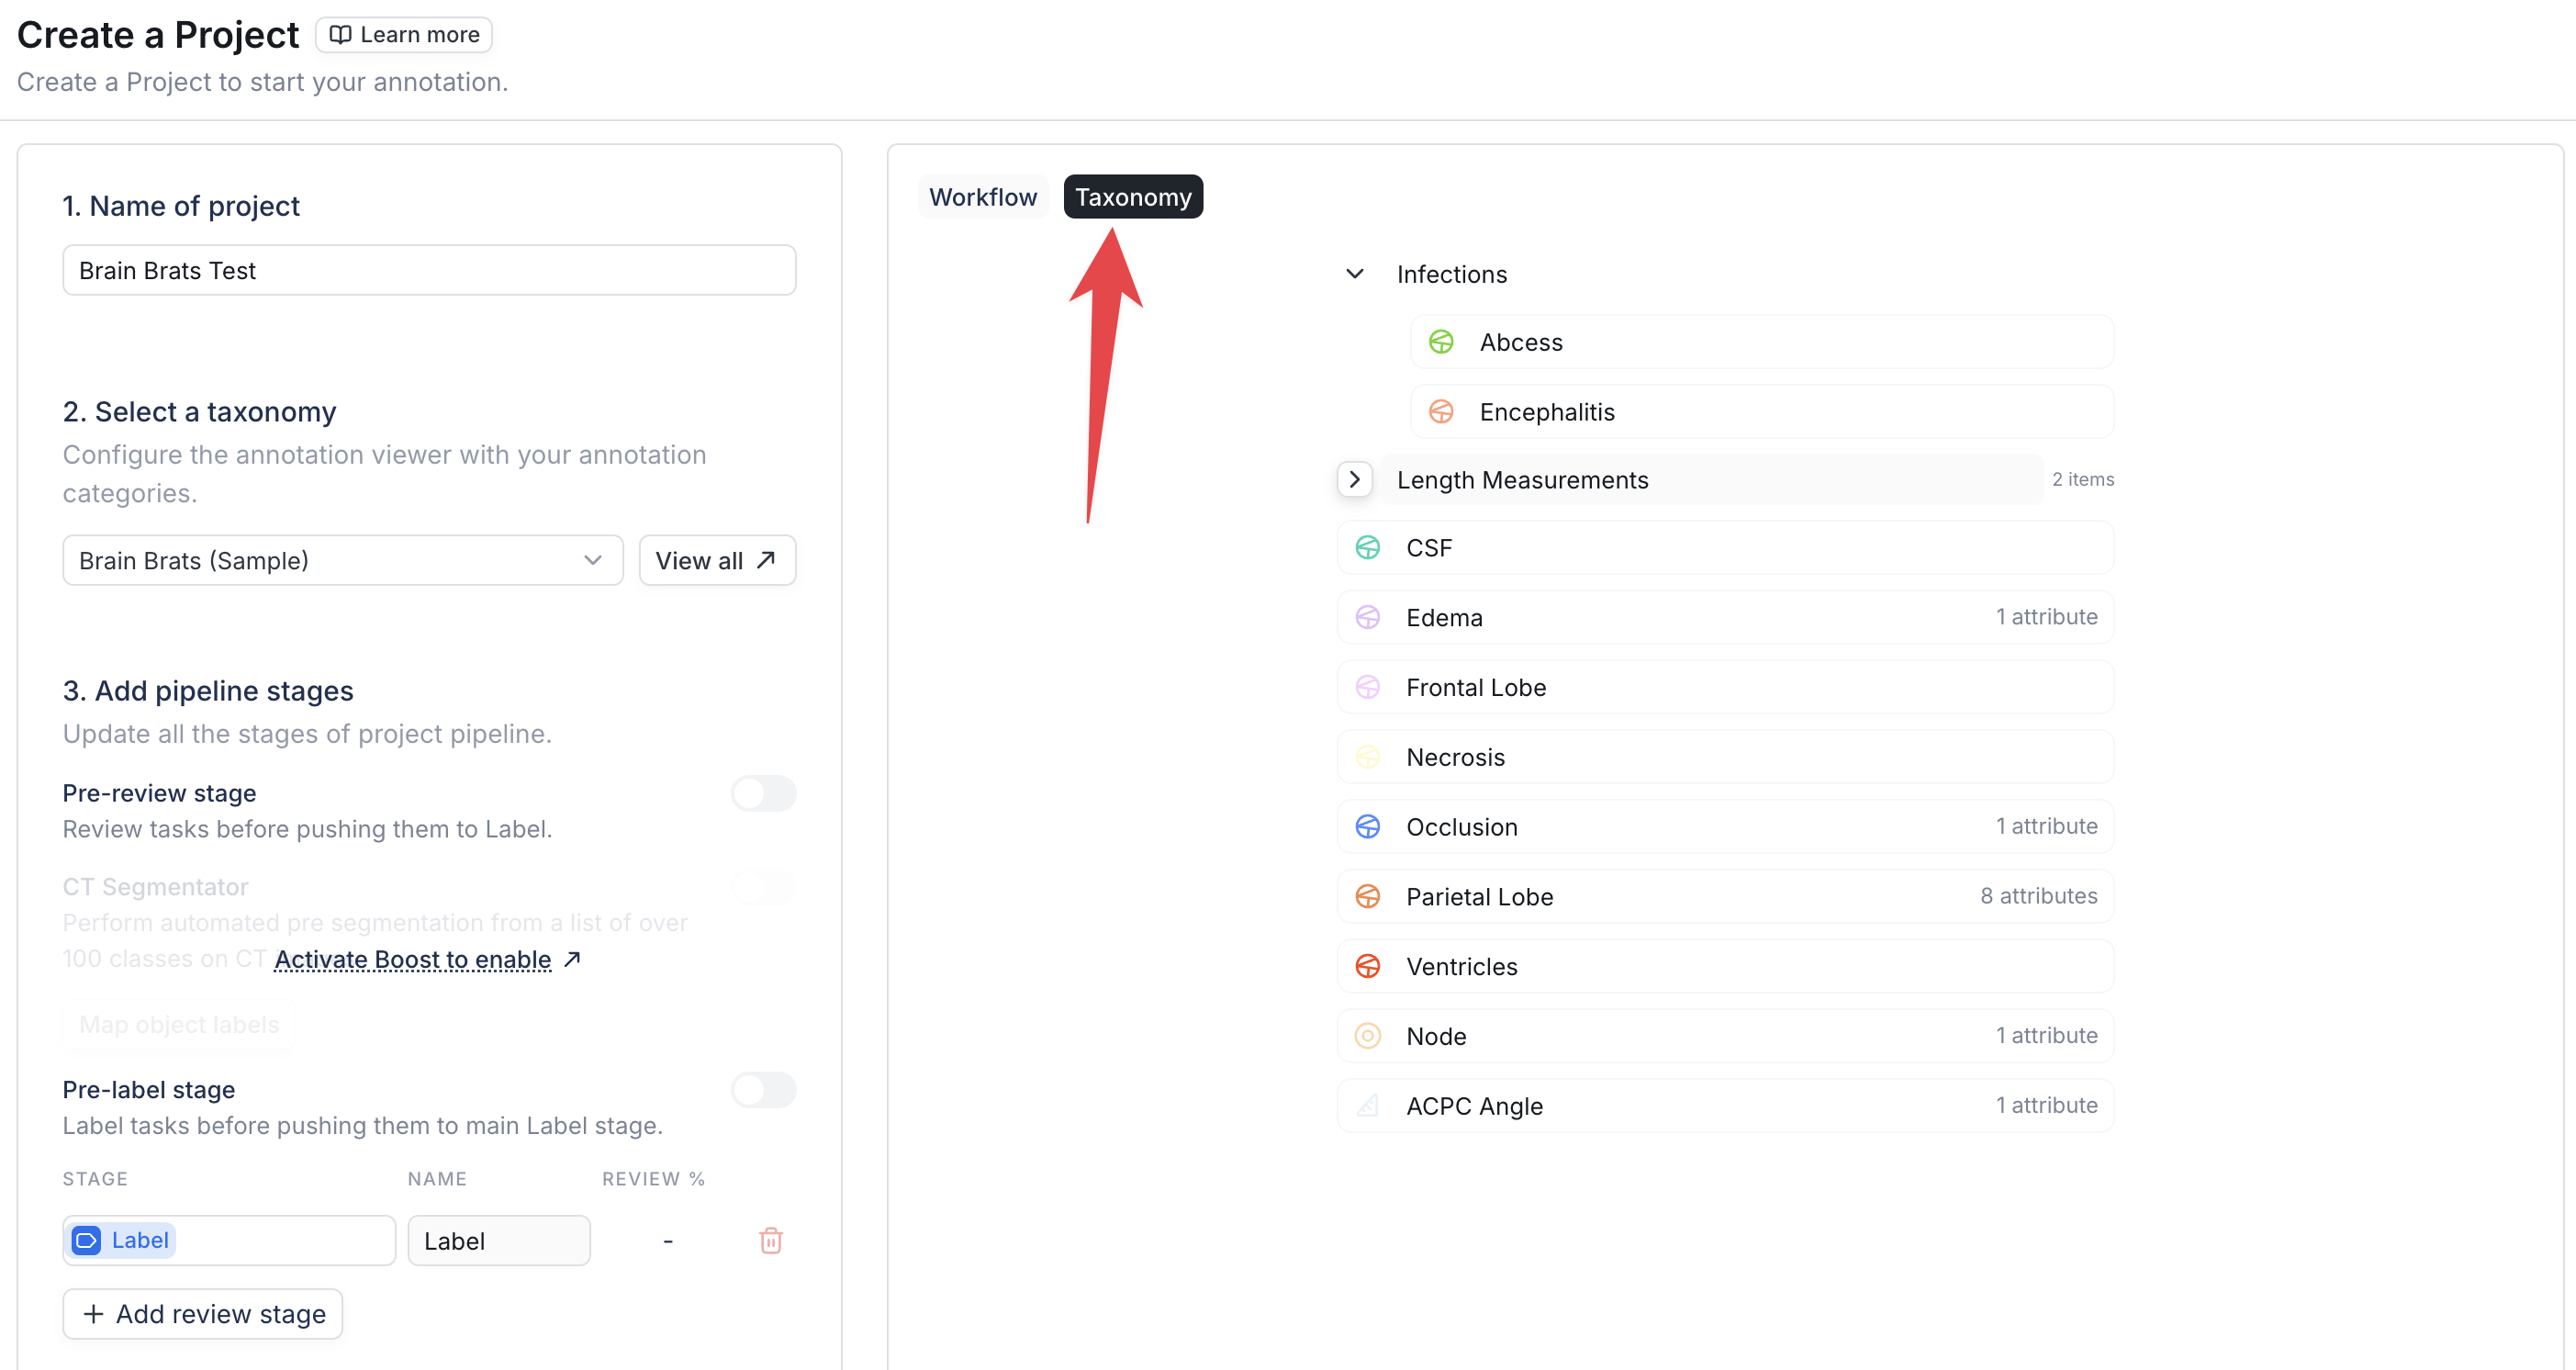
Taxonomies are stored at the Organization level, which allows you to reuse a single labeling Taxonomy across Projects. To preview the Taxonomy during project creation, simply click on Taxonomy in the top left corner of the center card.
Step 3: Define your Project Workflow
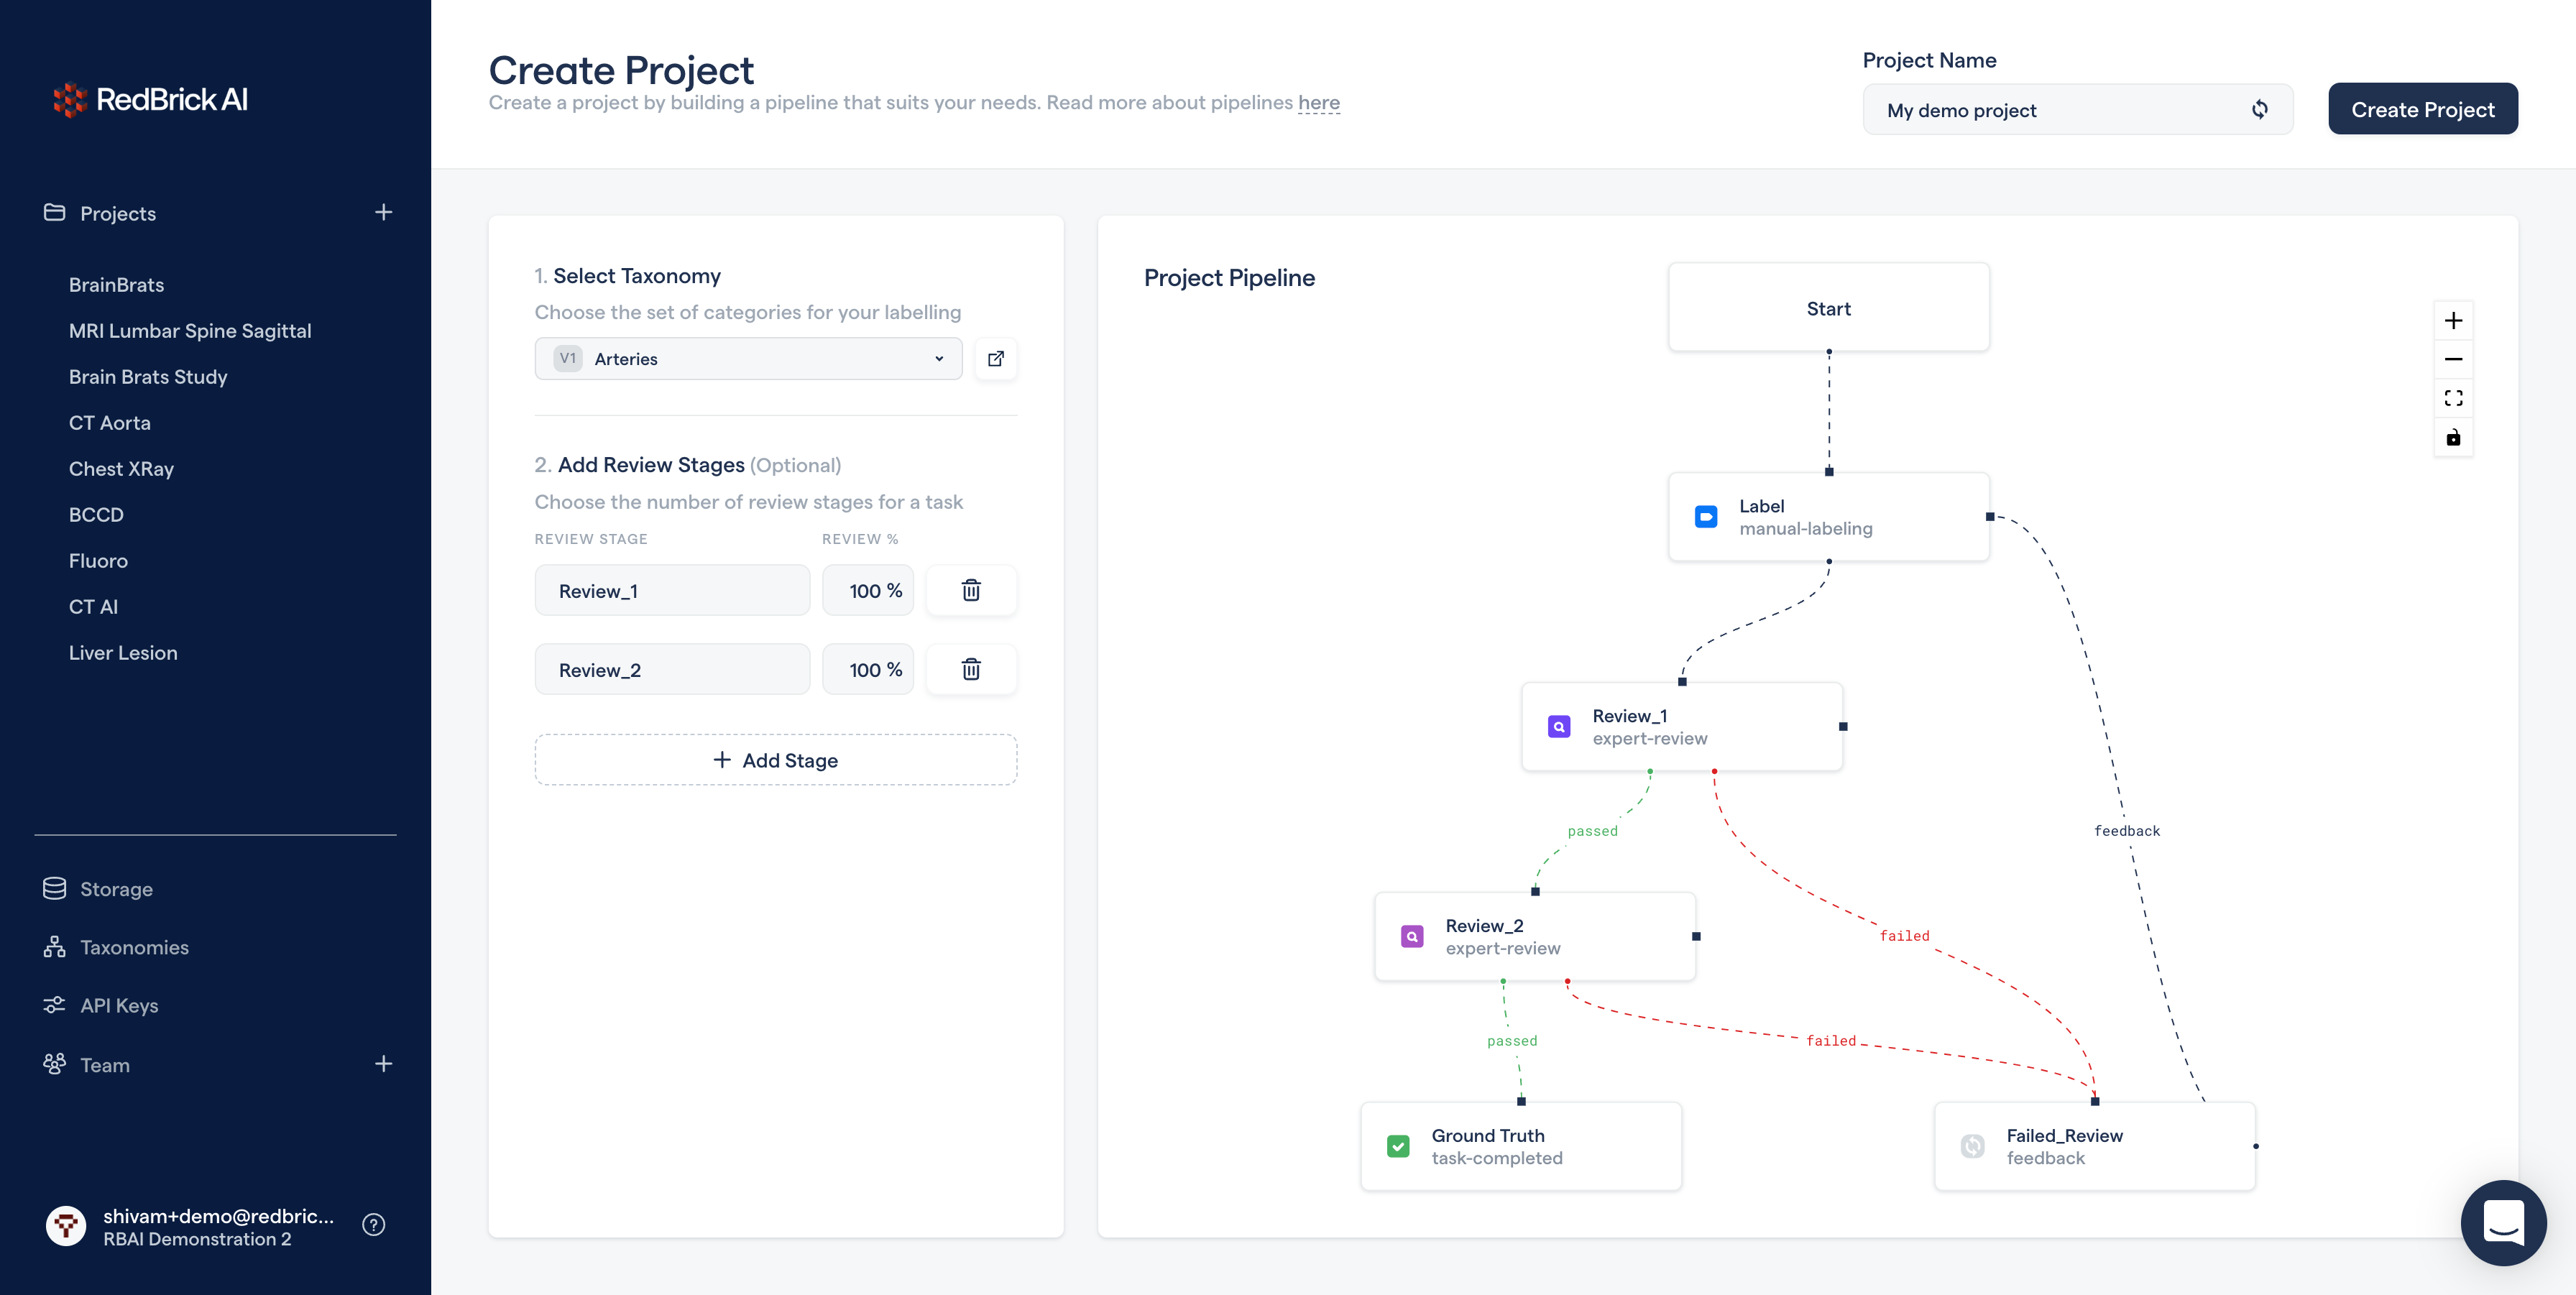
Project workflows allow you to explicitly define a series of annotation and review stages in your project. You can also configure the number of review stages and the review percentage (i.e. randomly select a subset of data for pseudo-random review) in your workflow. Once your data has successfully passed through all stages of your workflow, it will reach the Ground Truth Stage. A common workflow included a single Label Stage followed by two Review Stages where different sets of reviewers validate the annotations performed.When a reviewer rejects a Task in a Review Stage, it is sent back to the Label Stage and automatically assigned to the same Labeler who annotated it the first time.
Pre-review and Pre-Label stage
Pre-review stage
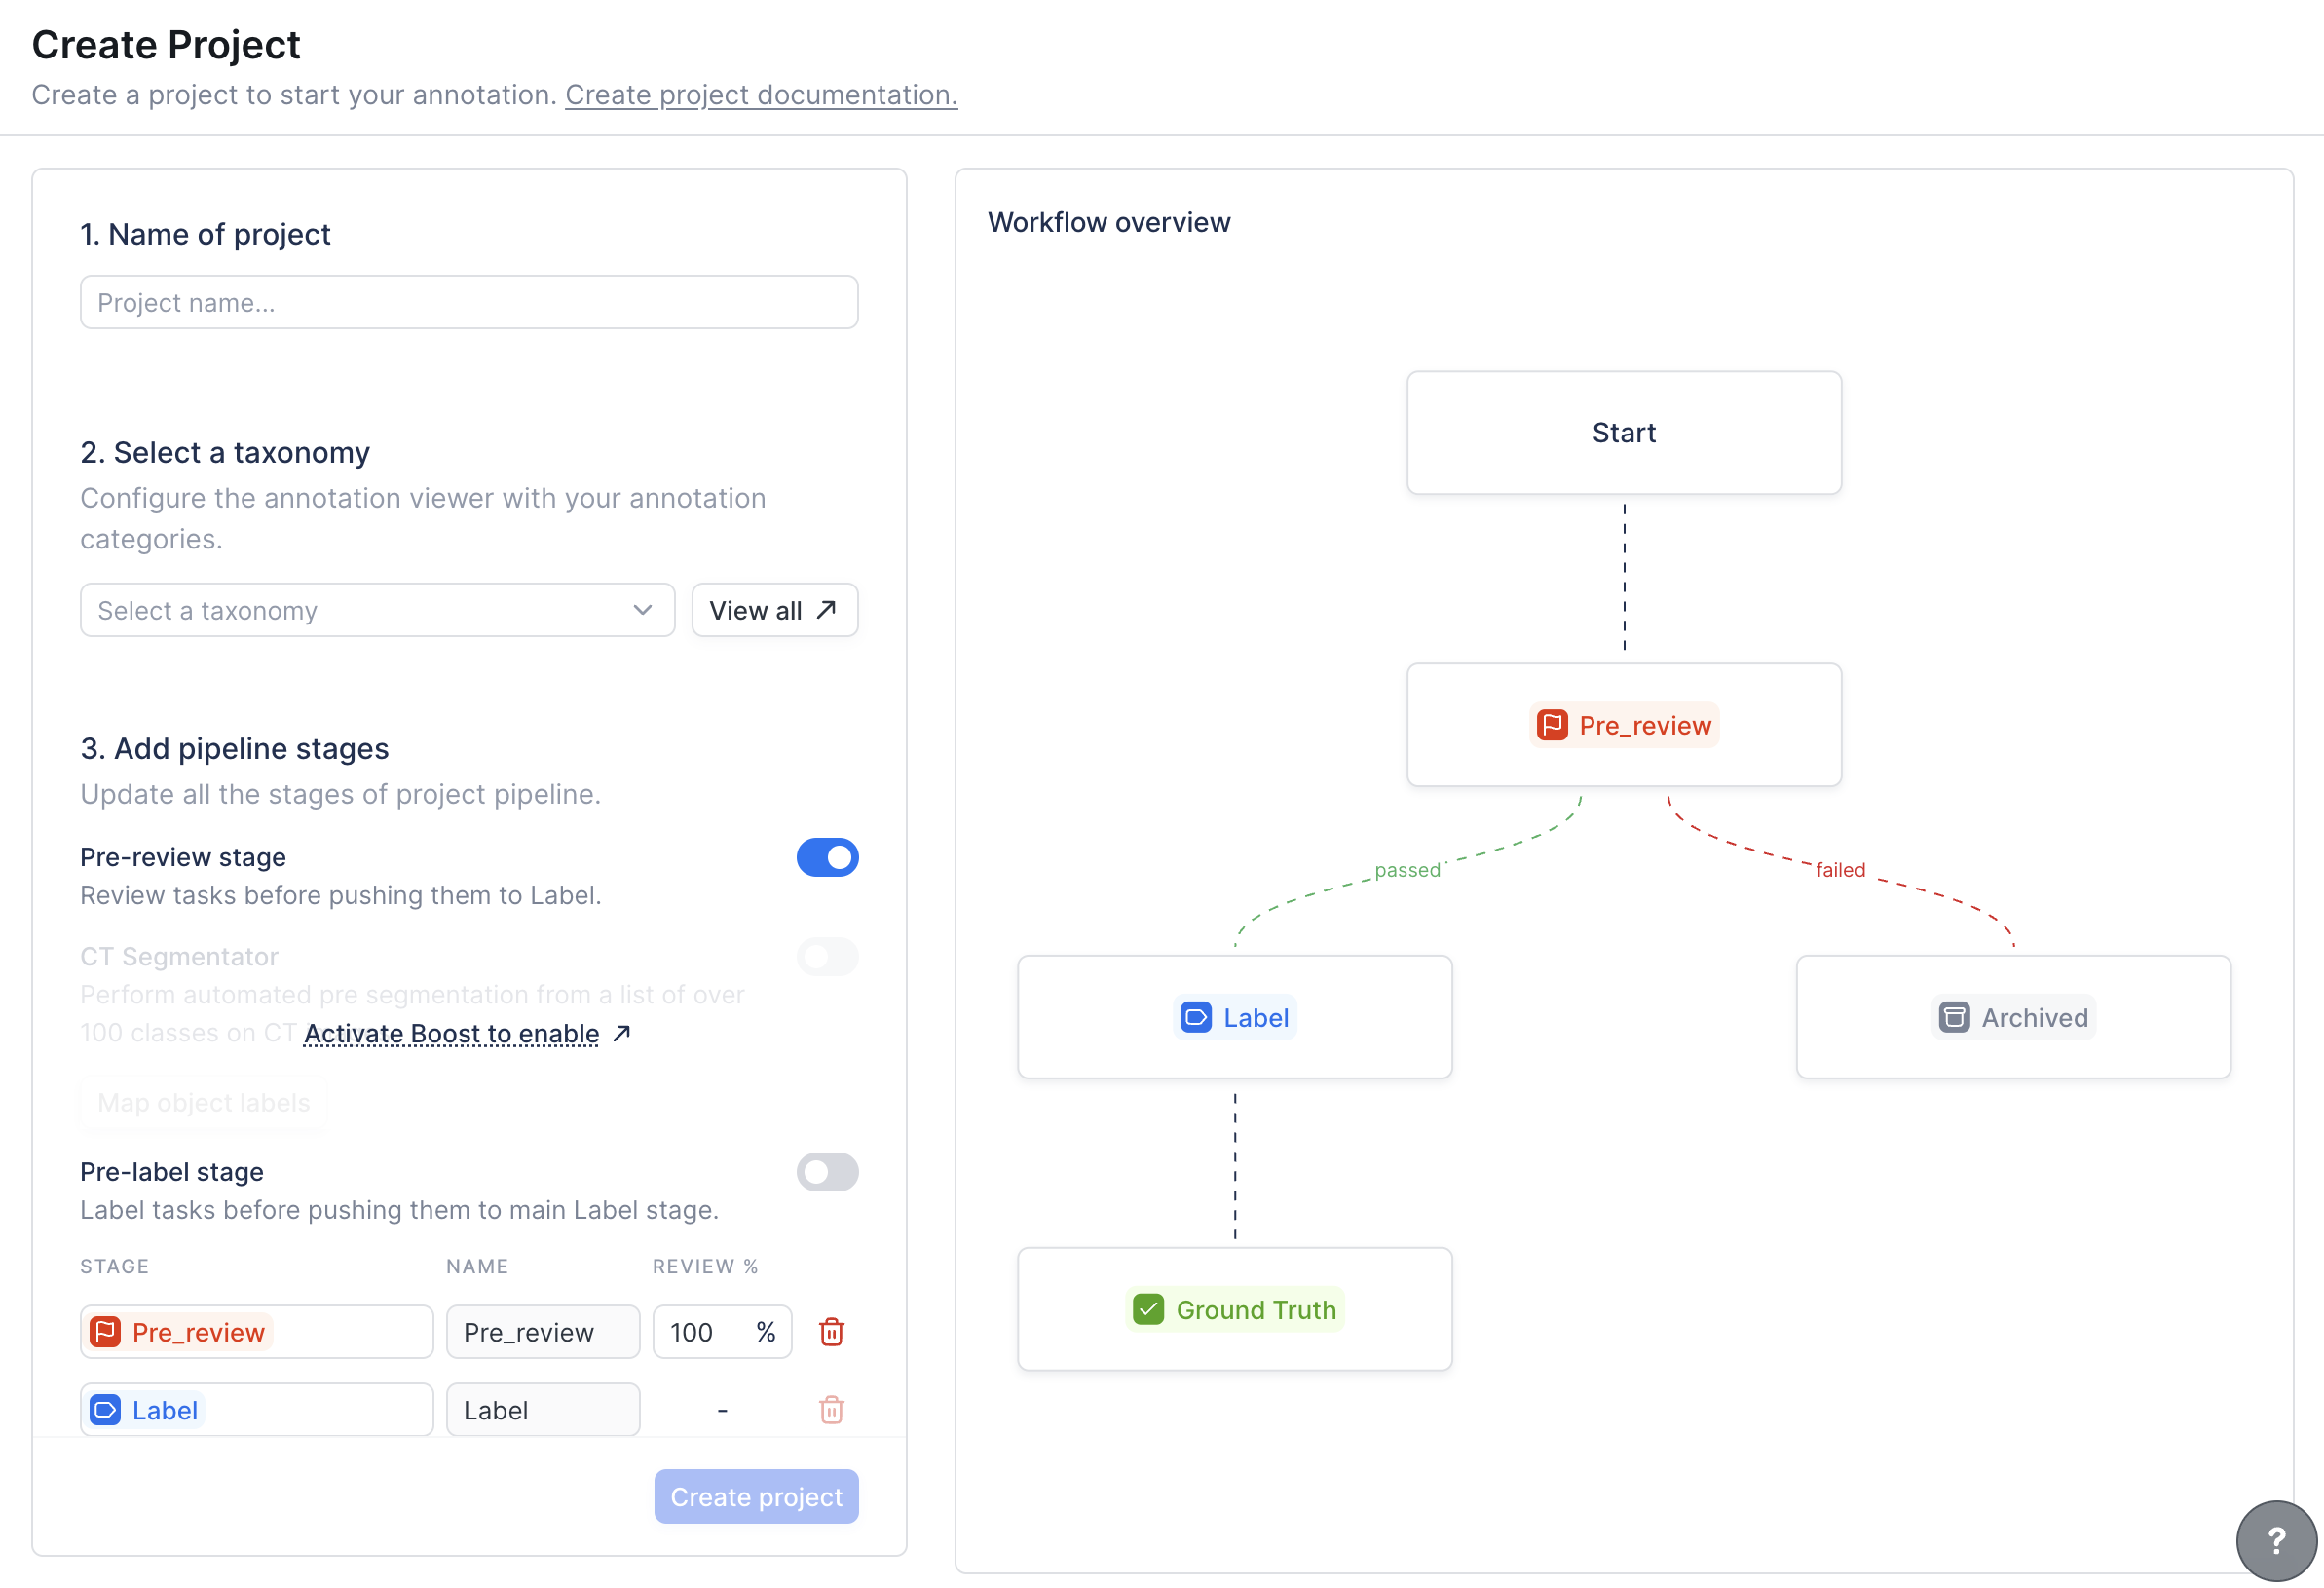
The Pre-review stage enables you to examine tasks for quality control or other purposes before they proceed to the labeling stage. To enable the pre-review stage for your project, follow these steps:- Begin by creating a new project.
- Turn on the pre-review stage by clicking the toggle button.
- Once activated, the pre-review stage will be added to the workflow.
- After all the stages are added, click the “Create Project” button.
- Navigate to the “Data” tab, and begin reviewing tasks. You can then either accept or reject them as needed.

Pre-Label stage
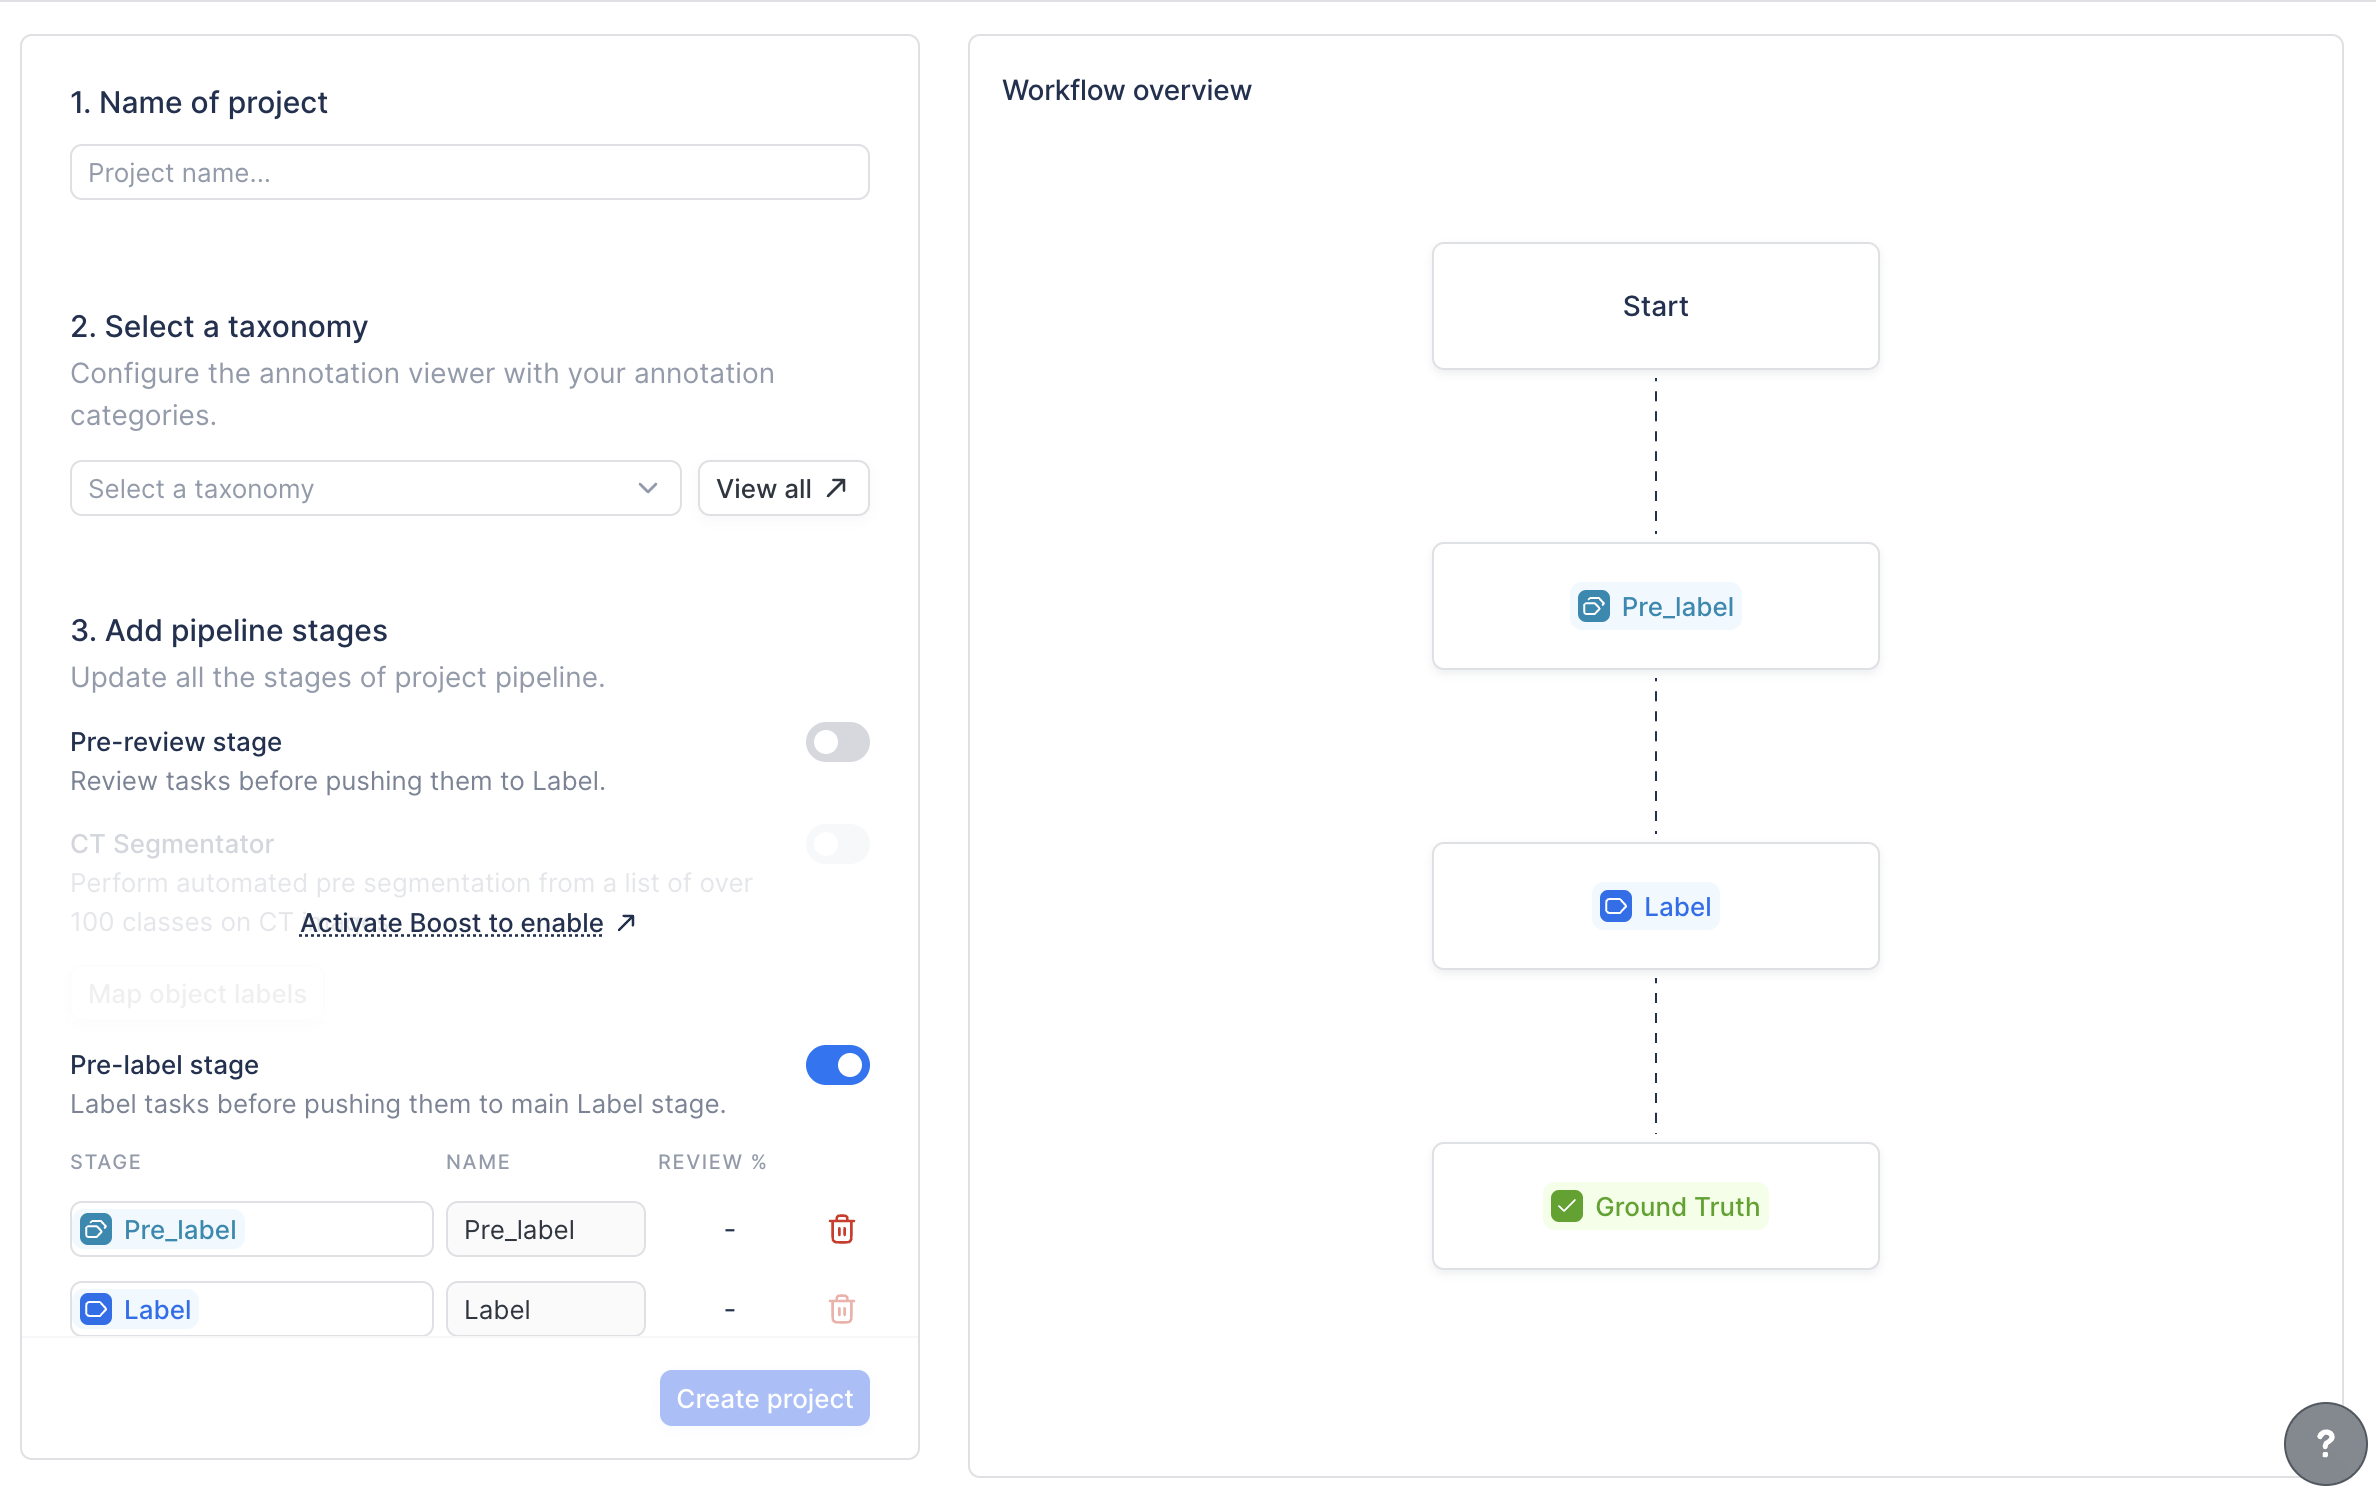
The pre-label stage enables you to label and classify tasks before they are moved to the labeling stage. This stage simplifies the process, especially for complex projects.
- Begin by creating a new project.
- Turn on the pre-label stage by clicking the toggle button.
- Once activated, the pre-label stage will be added to the workflow.
- After all the stages are added, click the “Create Project” button.
- Navigate to the “Data” tab, and begin labelling the tasks.
Basic Project Setup
Once you have successfully created a Project, you will most likely want to perform the following actions to add collaborators and data and modify Project settings.Adding Labelers to your Project
By default, all Org Admins have comprehensive access to all Projects. As with any elevated role, we recommend taking care when designating fellow team members as Org Admins. Generally speaking, it’s advisable to add Labelers and Reviewers to your Organization as Org Members. This grants them access to your Organization on the RedBrick AI Web Application, but limits their access and permissions. Org Admins have granular control over the Project-level access of all Org Members. In order to add Labelers or Reviews to individual Projects, we recommend the following:- On the Team Page, invite the Labeler/Reviewer as an Org Member (MEMBER).
- After the Labeler/Reviewer accepts their invitation and creates an account, navigate to the Project you’d like to add them to and open the Workforce Tab. From there, you can invite the Labeler/Reviewer to the Project as either a Project Admin or Project Member. Please note that if your Labeler/Reviewer is a Project Admin, they will have access to all Stages of a Project, as well as the Project Settings.
- If your Labeler/Reviewer is a Project Member, you can regulate their access to various Stages limited based on your workflow’s needs or regulatory requirements.
Organization and Project Roles
Uploading Data
You can upload data to a Project either through the UI or CLI/SDK. Most teams tend to integrate external storage and host their own data, however, you can also directly upload data to RedBrick AI servers. If you’d like to upload annotation files alongside your images and/or volumes, you must use our CLI/SDK.Importing Data an Annotations
Assigning Tasks
Once you have uploaded data to your Project, RedBrick AI will begin automatically assigning Tasks to the users in your Project. You can learn more about the specifics of task assignment by referencing the documentation below.Tasks and Assignment

