As of v2023.10.31.1:
- Thresholding is now referred to as Masking;
- the Windowing Panel is now referred to as the Visualization Panel;
CTRL and LEFT CLICK dragging on any viewport - up/down to adjust Window Level, left/right to adjust Window Width.
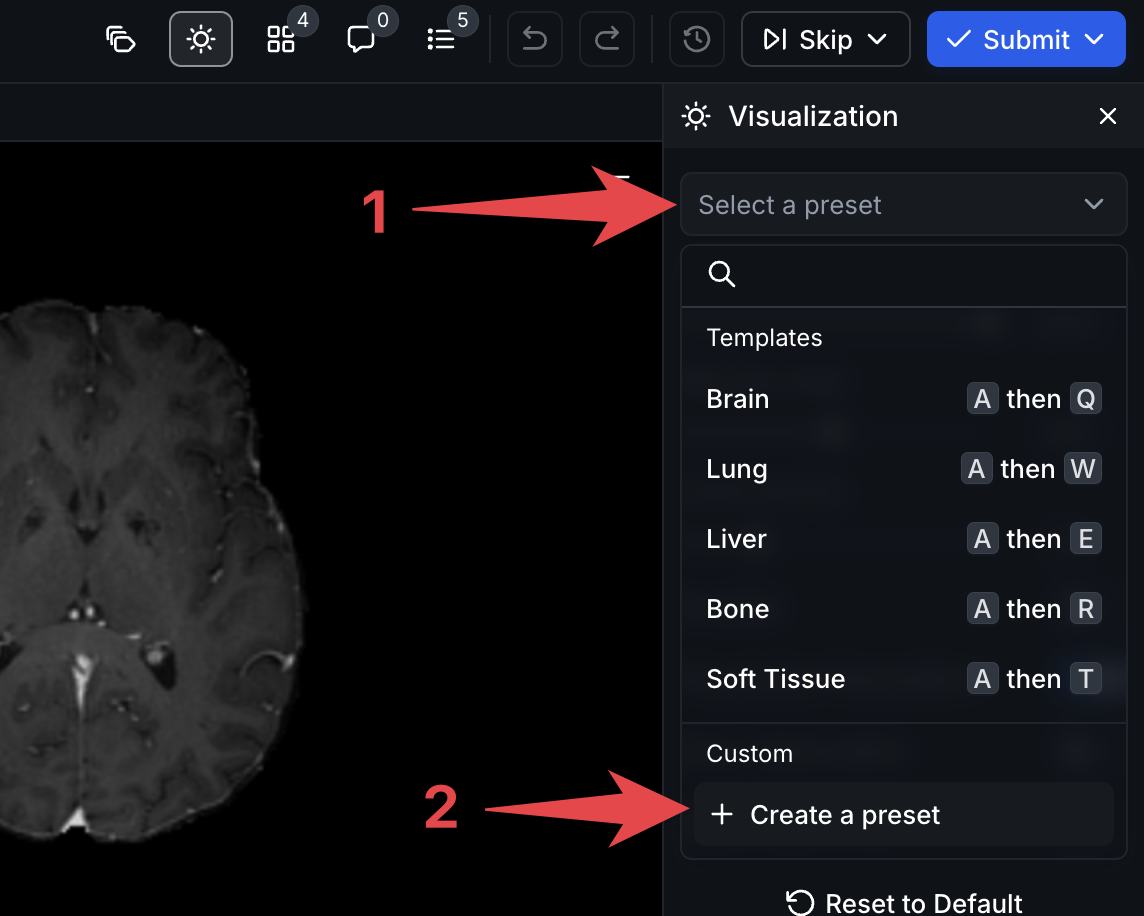
You see and/or modify the current Visualization settings by selecting the Visualization Panel on the top right of the tool bar.
When the Visualization Panel is open, its settings will display in the right hand Context Panel:
- Window Width
- Window Level
- Optional Presets
- Inverted View
- Pixel Interpolation
- Label Opacity
- Label Outlines
Custom Windowing Presets
You can set custom presets for windowing settings and set custom keyboard shortcuts for them within the RedBrick Annotation Tool.
All custom keyboard shortcuts can be configured and referenced on the User Preferences page.
Creating a Custom Windowing Preset
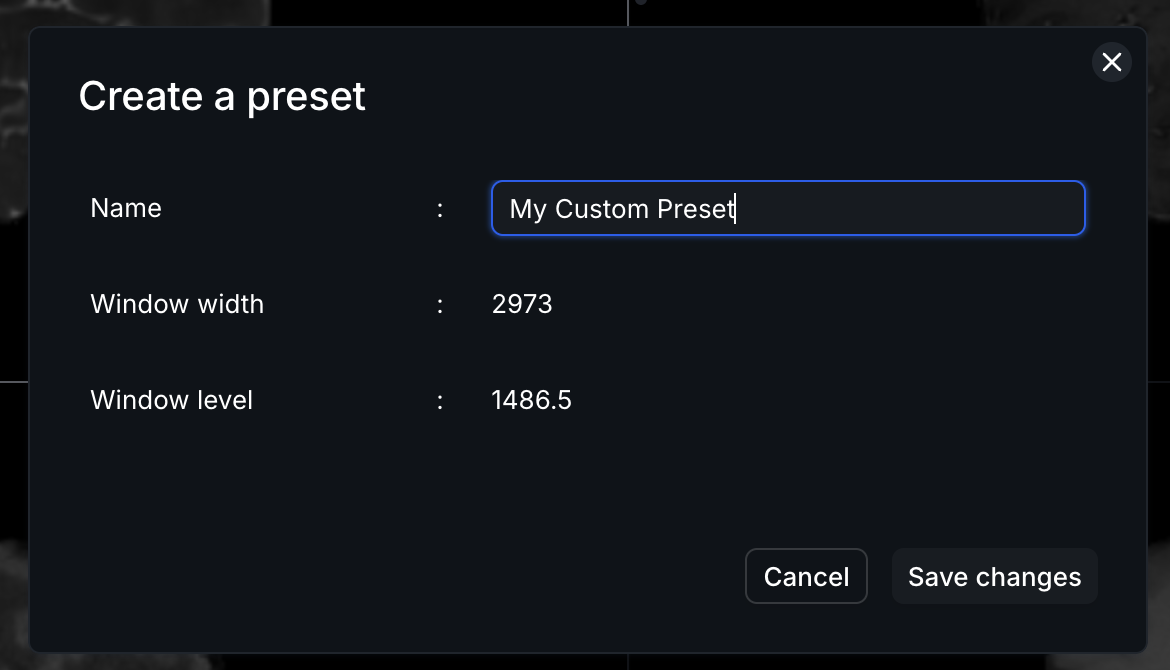
First, set your Windowing Width and Level to the desired values.
Then, click on Select a preset and then Create a preset within the Visualization Panel.
You will then be presented with a pop-up window that will allow you to name your custom preset. Provide a name and click on Save changes to create the preset.
Modifying an Existing Custom Preset
To update a custom preset:
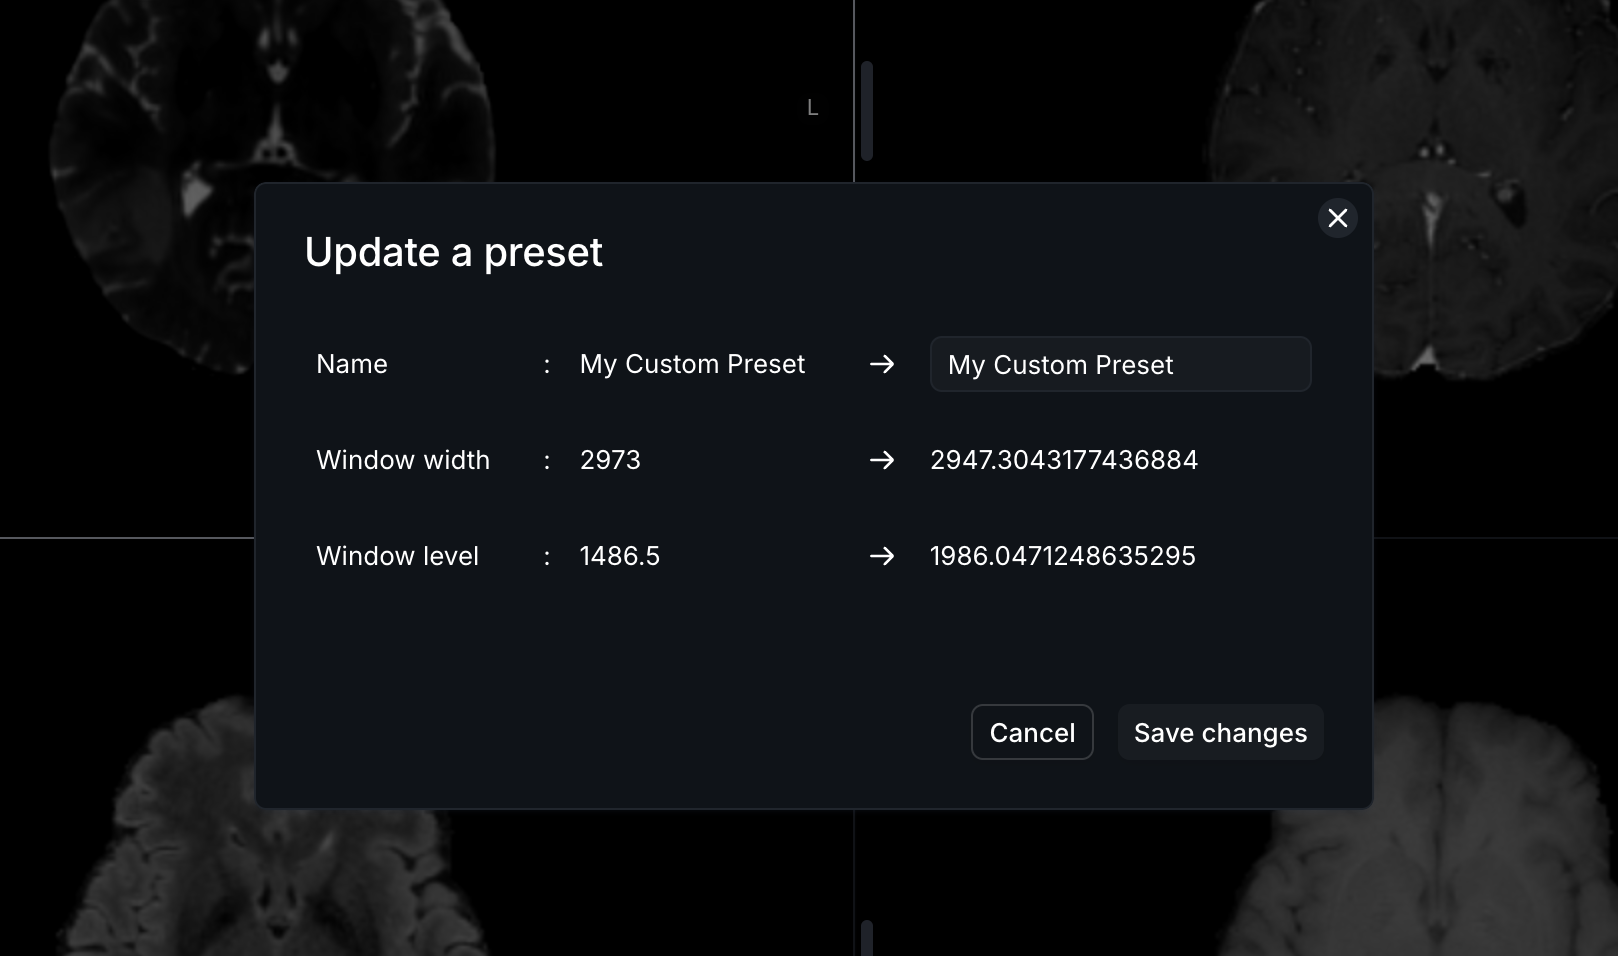
- set the desired Windowing Width and Level values
- in the Visualization Panel, open the presets dropdown
- click on the three-dot menu next to the custom preset you wish to modify
- select Update preset
You’ll then be presented with a pop-up that includes a summary of the changes to your custom preset. You can modify the name of the preset as well as an optional step.
Once you are satisfied with the changes, click Save changes.
Deleting a Custom Preset
To delete a custom preset:
- in the Visualization Panel, open the Presets dropdown
- click on the three-dot menu next to the custom preset you wish to delete
- select Delete preset
Masking
The Masking Panel consists of the following elements:
- Editable Area dropdown
- Modify Other Segments dropdown
- Restrict by pixel intensity toggle
- Masking Range slider
- Threshold Range Selector
Editable Area
The Editable Area dropdown has two selections - Everywhere and Inside all segments.
Selecting Everywhere allows you to draw on any part of the canvas.
Selecting Inside all segments makes it impossible for you to annotate on an unannotated area of the canvas. In other words, you must annotate within the bounds of an existing annotation.
Modify Other Segments
The Modify Other Segments dropdown helps you control how your painting affects other existing annotations.
Selecting Overlap will allow you to paint on top of other annotations. This process is additive, which means annotating with Overlap does not alter or delete other annotations.
Selecting Overwrite unlocked segments will also allow you to paint on top of other annotations, but you will overwrite (and therefore delete) anything else that you paint on top of.
For a visual walkthrough of how to configure Editable Area and Modify Other Segments settings, as well as a demonstration of the differences between them, please see the following video tutorial:
To speed up segmentation, you can create a masking range by applying an upper and lower boundary for the HU values/intensities of your image or volume.
To enable Masking, select any Object Label of type Segmentation in the left hand toolbar and click on Restrict by pixel intensity in the right hand Context Panel.
With Masking enabled, you will only be able to create annotations within the range that you set, making it easy to avoid painting “outside the lines” of your target structure.
You can also use the Threshold Range Selector, which allows you to interactively define the bounds of your masking range. With the Range selector activated, left click any part of a viewport to include it in the range or right click to exclude it from the range.
The pixel restriction will be applied as long as the masking filter is toggled ON. These settings are visible in the right hand Context Panel.